Contents
- 1 Introduction to Tinkerbell Costume Crafting
- 2 Gathering Your Materials
- 3 Preparing the Pattern and Cutting the Fabric
- 4 Sewing the Costume Together
- 5 Adding the Finishing Touches
- 6 No-Sew Alternatives for the Tinkerbell Costume
- 7 Tips and Tricks for Dressing Up
- 8 Wrapping Up: Final Steps and Presentation
Introduction to Tinkerbell Costume Crafting
Embarking on the enchanting journey of creating a DIY Tinkerbell costume promises both fun and creativity. As you begin, imagine the joy on a little one’s face when they twirl in their handmade fairy attire. Crafting a Tinkerbell costume is not merely an activity; it’s an opportunity to spark imagination and craft memories that will flutter in your heart like Tinkerbell’s own magical wings.
To ensure a successful crafting experience, this guide will walk you through the basics. From selecting the right fabrics that echo Tinkerbell’s iconic look to securing essential sewing supplies, each step is simplified for both novices and seasoned DIY enthusiasts. Ready your sewing space and get set to sprinkle some pixie dust on your sewing machine as we venture into the whimsical world of costume crafting. With patience and a pinch of Tinkerbell’s magic, even beginners can create a costume that’s sure to enchant at dress-up parties or during Halloween festivities.
Gathering Your Materials
Gathering the right materials is foundational to creating a magical DIY Tinkerbell costume. As you prepare to craft this enchanting attire, focus on achieving that iconic Tinkerbell charm with sparkling fabrics and a few clever sewing hacks. Your materials list will set the stage for a costume that’s as durable as it is delightful.
Selecting Fabrics for the Costume
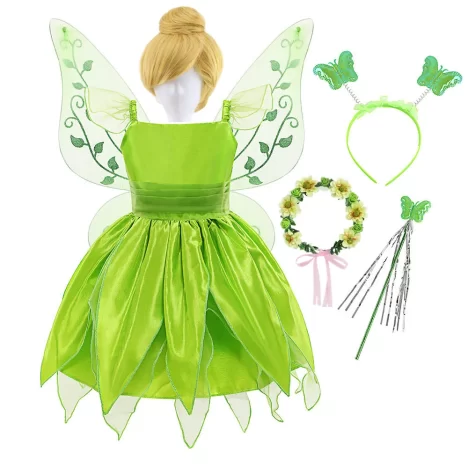
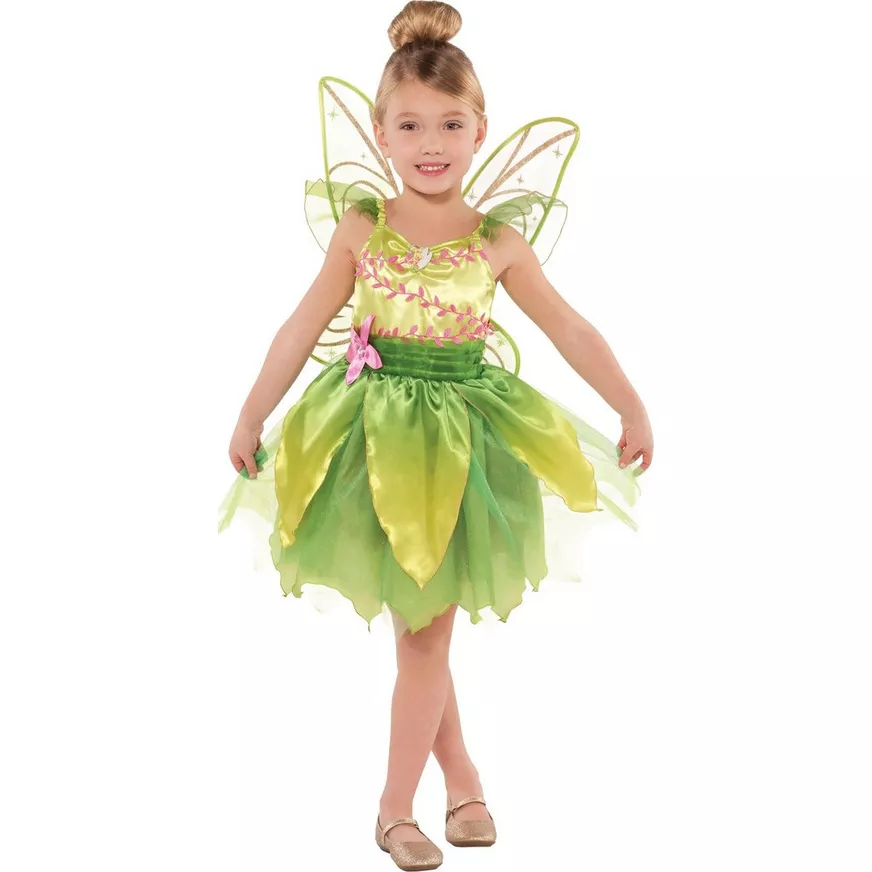
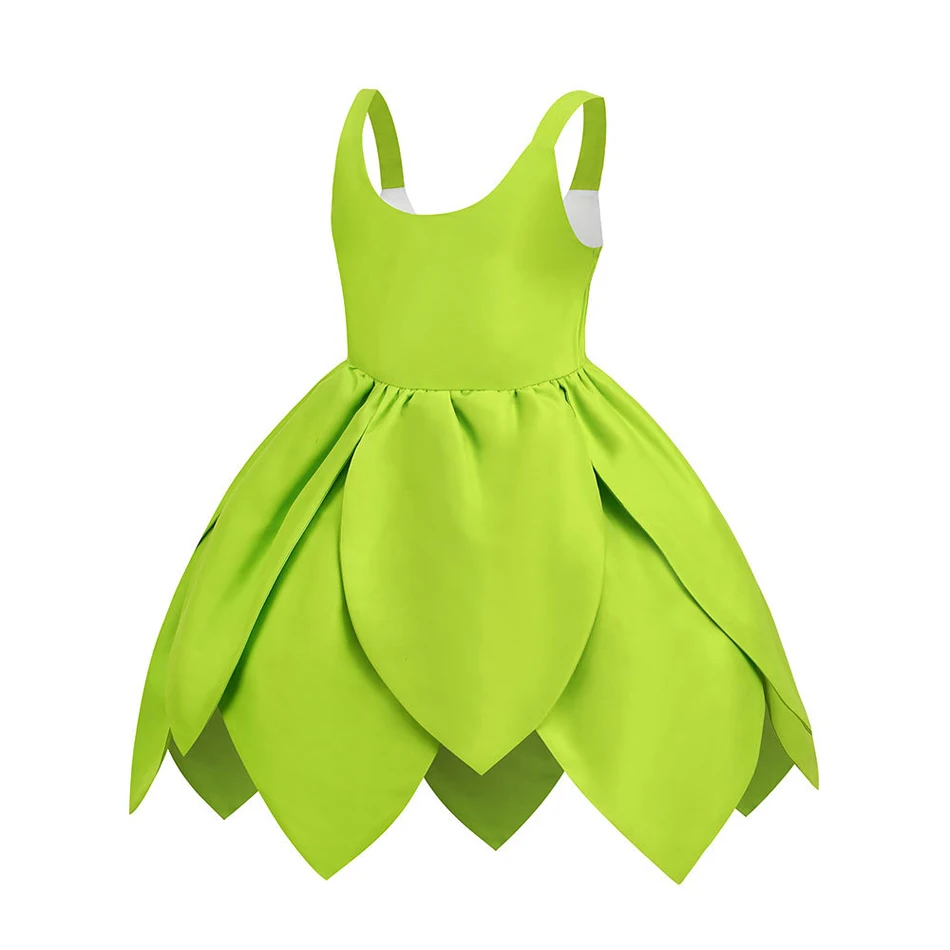
When selecting fabrics, visualize Tinkerbell’s classic dress. Aim for lightweight, shimmery fabrics that will mimic her whimsical style. A mix of green dress up satin for the bodice and matte green tulle for the skirt captures Tinkerbell’s essence perfectly. Consider adding a special touch with specialty fabric like a pleated foil ombré to give a leaf-like sheen, bringing an extra layer of fairy-tale magic to the costume. Remember, your fabric choices should not only be visually appealing but also comfortable and easy to move in for the little fairy wearing the costume.
Essential Sewing Supplies
Next, ensure you have the essential sewing supplies at hand. Start with a basic sewing machine. Add in scissors for precision cuts, coordinating thread to seamlessly blend your stitches, and pins for keeping fabrics in place as you sew. Having scraps of iron-on interfacing and optional fabric glue can provide structure and a no-sew alternative where needed. Before we delve into the cutting and sewing process, check that these materials are ready—this step saves time and simplifies the creation of your DIY Tinkerbell costume.
Preparing the Pattern and Cutting the Fabric
Creating a Tinkerbell costume starts with the right pattern and fabric cuts. First, lay out your selected fabrics. You should have green dress up satin and green tulle. Keep the specialty fabric if you’ve chosen any. Make sure they are ironed and wrinkle-free for accurate cutting. You’ll need a pattern that resembles Tinkerbell’s iconic dress. If you’re comfortable, you can draw the pattern freehand; otherwise, use a ready-made pattern or one from a trusted online source.
Creating the Costume’s Main Structure
The main structure includes the dress bodice and the skirt. For the bodice, measure the chest, waist, and length from shoulder to waist of the child who will wear the costume. Transfer these measurements onto your fabric. Sketch out Tinkerbell’s leafy dress hemline. Cut the satin to form the bodice, allowing extra for seams. If you’re making a one-piece dress, attach the skirt portion of the pattern to the bodice portion before cutting.
For the skirt, decide on the length for modesty and comfort. It should also allow for easy movement. Cut the green tulle into long strips for a fluffy, layered skirt. Remember, Tinkerbell’s skirt is playful and short, but the length is adjustable to your preference.
Designing the Fairy Wings
Tinkerbell’s wings are essential for the magical look. Use a sturdy yet flexible wire to shape the wings. Cover the wire frame with a sheer, iridescent fabric that catches the light beautifully. Make the wings detachable for easy wear and safety. Pin the wing pattern to the fabric, cut out two pieces for each wing, and then sew them onto the wire frame. Ensure they’re symmetrical and accurate to the character’s iconic silhouette.

Sewing the Costume Together
Crafting a DIY Tinkerbell costume takes shape as you bring together the satin bodice and tulle skirt. It’s time to bring your fairy costume to life with your sewing machine and some patience. Follow these simple instructions for sewing the costume together, step by step, ensuring your little fairy will have a costume fit for fluttering and twirling to their heart’s content.
Assembling the Satin Bodice
Begin by laying out your cut pieces of green dress up satin. Pin the front and back pieces together along the sides and shoulders, making sure the right sides face each other. Sew along these edges, leaving room for armholes and the neckline. If you included seam allowances, sew just inside these lines. Turn the bodice right side out, iron the seams flat, and try it on your little fairy for size. Make adjustments if needed before moving to the skirt attachment.
Remember to backstitch at the start and end of your seams to make sure they’re strong. This way, the bodice will handle all types of play and movements.
Attaching the Tulle Skirt
Now, take your green tulle that’s been cut into strips. Gather the top edge of the tulle to create a fluffy, voluminous effect. Evenly distribute the gathering and pin the tulle to the bottom of the satin bodice. Sew along the pinned edge, attaching the skirt securely to the bodice. Use a zig-zag stitch for added durability and to prevent the tulle from fraying.
For extra flair, consider layering multiple strips of tulle. This will make the skirt fuller and more reminiscent of Tinkerbell’s iconic look. After attaching the skirt, let your little one give it a twirl! This moment is the magical reveal when the costume truly comes together.
Adding the Finishing Touches
Once the essential parts of the Tinkerbell costume are assembled, it’s time to add the final flourishes that will make the costume truly enchanting. Paying attention to detail transforms a simple costume into a magical outfit worthy of Tinkerbell herself.
Creating Leaf Apron Detail
The leaf apron adds an authentic touch, capturing Tinkerbell’s connection to nature. Start by cutting leaf shapes from the green satin fabric. Use a template if necessary for consistent sizes and shapes. Next, sew these leaves onto a wide fabric strip to form the apron’s waistband. Ensure the leaves overlap slightly to mimic Tinkerbell’s dress design. The apron should tie comfortably at the back, allowing for easy size adjustments.
Embellishing with Fairy Accessories
Tinkerbell’s costume isn’t complete without sparkling fairy accessories. Create a wand using a simple stick adorned with ribbons and a star. For footwear, decorate plain ballet flats with glitter or sequins. Don’t forget the most critical accessory: Tinkerbell’s wings. Attach them securely to the costume, ensuring they’re positioned correctly for that magical pixie look. With these final accents in place, your DIY Tinkerbell costume is set to dazzle and inspire imaginative play.
Remember to sprinkle your costume with a dose of ‘pixie dust’ by adding subtle sequin or glitter accents for extra sparkle. Whether for Halloween, a birthday, or everyday dress-up, this Tinkerbell costume will undoubtedly bring joy and a touch of magic to any little fairy’s adventures.
No-Sew Alternatives for the Tinkerbell Costume
For those who may not have a sewing machine or simply prefer not to sew, fear not! There are still ways to craft a delightful Tinkerbell costume without ever threading a needle. By using fabric glue and iron-on interfacing, you can create a costume that’s just as enchanting.
Using Fabric Glue and Iron-on Interfacing
Fabric glue and iron-on interfacing are your no-sew friends. They allow you to bond fabrics without stitches. Apply fabric glue along the edges of your green satin and tulle. Press firmly to adhere. Iron-on interfacing gives structure to your costume. Cut it to match your fabric pieces, then iron them together. This combo can create a sturdy, lasting Tinkerbell costume.
Alternative Fastening Methods
Velcro and snaps are great alternatives to traditional sewing methods. They make costume fitting easy and adjustable. Attach Velcro strips to the leaf apron and bodice back for a snug fit. Use snaps for attaching wings or decorations. These easy-to-use fasteners give your diy tinkerbell costume functional versatility while keeping the magical look intact.
Tips and Tricks for Dressing Up
As your little one delights in their DIY Tinkerbell costume, consider some tips and tricks to make dressing up effortless and fun.
Adjusting the Costume for Growth
Kids grow fast, and you’ll want their Tinkerbell costume to keep up. Here’s how:
- Use adjustable closures like ties or Velcro for the waistband.
- Hem the costume with extra fabric inside. This lets you let out seams later.
- Choose stretchy fabrics for the bodice for more give over time.
These small changes mean your little fairy can enjoy their costume for longer.
Maintenance and Upkeep of the Costume
To keep the Tinkerbell costume looking magical, follow these care tips:
- Spot clean stains right away to avoid setting.
- Store the costume on a hanger to prevent wrinkles.
- Repair any loose threads or tears promptly.
With proper care, the costume remains a cherished item in the dress-up box.
By considering growth adjustments and practicing good maintenance, your DIY Tinkerbell costume can provide joy and imaginative play for years to come. Sparkling fairy tales await!
Wrapping Up: Final Steps and Presentation
As your magical DIY Tinkerbell costume nears completion, it’s important to address the final steps and presentation. This last stage is crucial as it wraps up all your hard work and showcases the finished product – a whimsical costume that will enchant and inspire playful adventures. Here are some tips to ensure that your costume is as practical as it is captivating.
Final Fitting and Adjustments
Before declaring the costume complete, conduct a final fitting on your little fairy. Look for any areas that may need small adjustments for comfort or better fit. If needed, make these minor changes now. This ensures the costume fits well and provides maximum enjoyment for the wearer.
Quality Check and Detailing
Give your costume a thorough quality check. Trim any loose threads and double-check the seams to make sure they’re secure. Pay attention to the small details like the evenness of the leaf cutouts or the symmetry of the wings. These finishing touches make all the difference.
Costume Presentation
It’s presentation time! Lay out the costume beautifully for the first official wear. Pair it with a little pouch of glitter to serve as pixie dust for added charm. Seeing the costume presented in full will bring a smile to any child’s face and spark imagination.
Capturing the Magic
Once dressed, capture the moment with a photo of your little one in their Tinkerbell attire. Choose a fitting background, like a garden or greenery, to complement the theme. These photos will serve as treasured memories of the magical vibes this costume brings to life.
Storage Advice
After the enchantment has settled, properly storing the costume will extend its life. Hang it up or carefully fold it away to avoid crumple and damage. This way, the Tinkerbell costume remains ready for more fairy-tale adventures at a moment’s notice.
The joy of crafting a DIY Tinkerbell costume comes full circle when your little one steps into their fairy tale world. Tying up these final elements ensures the costume is not only a delight to wear but also stands the test of whimsical playtime sessions. With a sprinkle of creativity and a dash of love, you’ve crafted more than just a costume—you’ve created magic.
