Dressing up as Red Riding Hood is a timeless choice that carries a mixture of nostalgia and intrigue. The character, made famous by the fairytale, symbolizes innocence, adventure, and resilience. As a costume, the red riding hood outfit is not only recognizable but also allows for a variety of interpretations. With an ever-growing DIY culture, creating your own red riding hood costume DIY makes the process even more rewarding. Whether you’re preparing for Halloween, a themed event, or a cosplay gathering, this comprehensive guide will provide you with everything you need. From materials and patterns to sewing tips and accessory ideas, you’ll be equipped to craft a charming and distinctive costume that reflects your personal touch. Join me on this journey into the magical realm of Red Riding Hood as we explore the ins and outs of creating the perfect costume.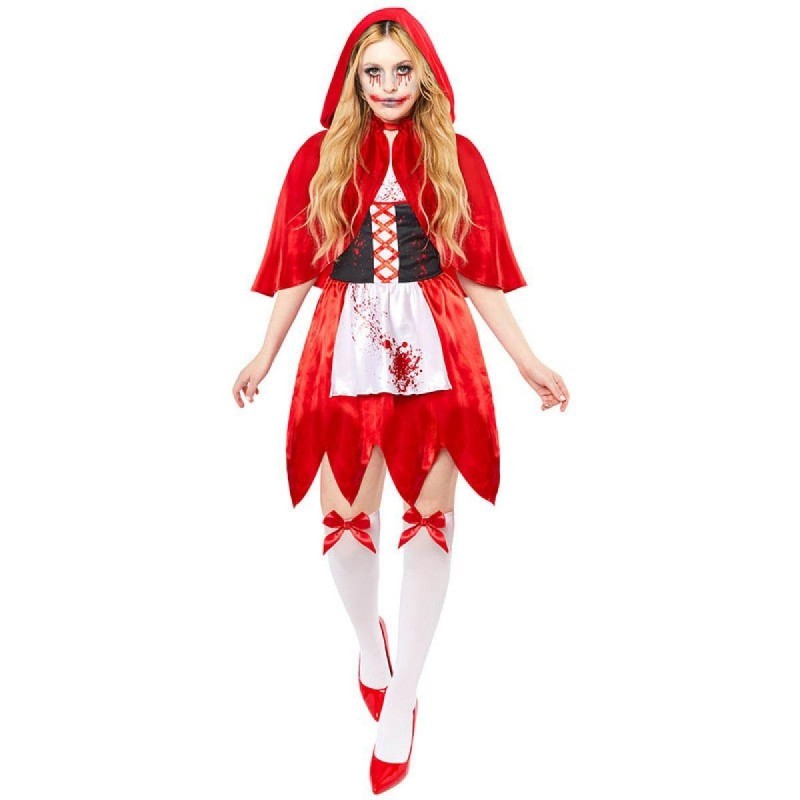
Contents
- 1 The Story Behind Red Riding Hood
- 2 Gathering Materials for Your Red Riding Hood Costume
- 3 Designing Your Red Riding Hood Dress
- 4 Crafting the Red Riding Hood Cloak
- 5 Accessorizing Your Easy Red Riding Hood Costume
- 6 Hair and Makeup to Complete Your Look
- 7 Tips for a Successful Red Riding Hood Costume Experience
- 8 Showcasing Your Red Riding Hood Costume
- 9 Conclusion: Embrace Your Adventure as Red Riding Hood
The Story Behind Red Riding Hood
Before diving into costume creation, it’s vital to understand the character and her backstory. The tale of Red Riding Hood has captivated audiences for centuries, evolving through cultural transformations.
Origins of the Story
The story traces its origins back to various European folk tales. The most recognized version comes from Charles Perrault in the 17th century, where Red Riding Hood is depicted as a young girl who encounters a wolf en route to her grandmother’s house. The later adaptation by the Brothers Grimm includes a more nuanced narrative with a darker twist, representing various moral lessons about innocence, caution, and the perils of deception.
Symbolism of Red Riding Hood
Red Riding Hood herself is a multifaceted symbol. The iconic red cloak represents several themes, including:
- Innocence: The character starts as a naive girl who believes she can trust the wolf, embodying the essence of childhood innocence.
- Courage: As the story progresses, she demonstrates bravery during her encounters with the wolf. This transformation highlights the strength one can find in adversity.
- Feminine Identity: The fairy tale also touches on emerging womanhood, as she navigates the dangers of life while representing the transition from girlhood to adulthood.
Understanding these themes adds depth to your costume-making process and allows for a more creative approach to designing your red riding hood costume DIY.
Gathering Materials for Your Red Riding Hood Costume
Once you’re familiar with the character and her story, it’s time to gather the materials needed to create your costume. Below are essential items that will help you craft the perfect red riding hood outfit.
Fabric Choices
Selecting the right fabric is crucial for the construction of your costume. Here are some fabric suggestions for various costume components:
- Red Cloak or Cape: A rich red fabric is essential for the iconic cape. Consider using velvet, fleece, or a lightweight cotton blend that drapes well.
- Dress or Skirt: For the dress underneath the cloak, you can choose a simple cotton or polyester fabric. Patterns like gingham or floral designs evoke a classic fairytale look.
- Lining Fabric: If you want to line your cloak for added comfort, opt for a softer fabric like satin or cotton in a complementary color.
Patterns and Sewing Supplies
Using patterns will help guide you as you sew your costume. Consider the following:
- Costume Patterns: Look for patterns specific to capes, dresses, or skirts. Many fabric stores offer pirate or fairy tale costume patterns that can be modified.
- Essential Sewing Supplies: Ensure you have all the necessary tools, such as:
- Sewing machine (or hand-sewing materials)
- Fabric scissors
- Measuring tape
- Pins and safety pins
- Thread matching your fabric colors
Accessories for Your Costume
Accessories play a significant role in completing your ensemble and enhancing the character’s story. Here are some suggestions:
- Basket: A small wicker basket can serve as a fun prop for your costume. Consider adding flowers, bread, or other thematic items inside to enhance the appearance.
- Footwear: Choose comfortable shoes that fit the overall look. Ankle boots, flats, or classic Mary Janes can bring your outfit together, depending on the style.
- Hair Accessories: Incorporate a headband or a simple hair clip featuring flowers or a bow to add a personalized touch to your pirate costume.
Fun Extras
Don’t forget to include props or extras that spotlight your creative flair. Here are some ideas: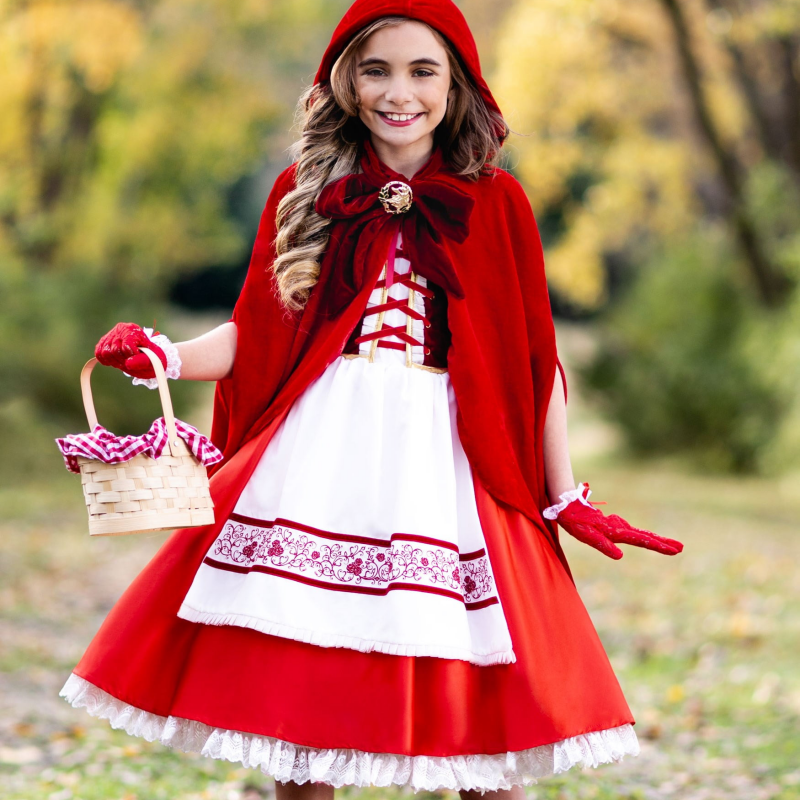
- Red Gloves: Add a pair of red gloves for an extra touch. This detail enhances the elegance while fitting the color scheme.
- Red Hood: Consider sewing a red hood as part of your cloak design. You can integrate this into the cape to elevate the authenticity of your outfit.
Thrift Store Finds
Keep an eye out for unique materials or clothing items at thrift stores. These shops can hold hidden treasures, offering vintage pieces that can be repurposed into your red riding hood costume.
Gathering these materials will prepare you for the crafting adventure of creating your red riding hood costume DIY!
Designing Your Red Riding Hood Dress
The dress is arguably the most vital component of your red riding hood costume. Let’s delve into the steps you will need to take to create the perfect dress.
Choosing Your Dress Style
- Classic Peasant Dress: Opt for a simple yet elegant peasant dress that embodies the fairy tale aesthetic. This style typically features a fitted bodice and a flowy skirt.
Cutting and Preparing the Fabric
- Taking Measurements: Measure your bust, waist, and hips to ensure the best possible fit. This step is crucial to achieving a comfortable and appealing silhouette.
- Cutting the Fabric: Follow your selected pattern carefully when cutting your fabric. Precision is key to making sure that all the dress pieces align correctly.
Sewing the Dress
- Assembling the Bodice: Start by sewing the bodice pieces together. Pay attention to the fit since adjustments can easily happen at this stage.
- Creating the Skirt: Once the bodice is complete, attach the skirt to the bodice, ensuring it flows well. You may want to gather fabric at the waist to create volume.
Adding Unique Features
- Decorative Elements: Enhancing your dress with decorative details, such as lace trim or ribbon accents, can elevate the richness of the costume. Consider adding a waistband or decorative belt to enhance the character’s shape.
Final Touches
- Hemming the Edges: Once the dress is assembled, make sure to hem all raw edges to create a clean and polished look. This step is essential for durability and presentation.
- Fit Check: Before finalizing the costume, try the dress on to confirm it fits comfortably. Address any areas that may require alterations.
Successfully crafting a beautiful dress for your red riding hood costume gives your ensemble a solid foundation and embodies the spirit of the character!
Crafting the Red Riding Hood Cloak
The cloak is the signature piece of the red riding hood costume, so it’s essential to design it well. Here’s how to create the ideal red cloak:
Selecting Your Fabric
- Main Fabric: Choose a vibrant red fabric that resembles the classic look. Velvet or soft cotton works excellently and ensures the cloak is comfortable to wear.
Cutting the Material
- Measurements: Measure the length you want the cloak to fall. A floor-length cloak can create a dramatic effect, while a knee-length version offers freedom of movement.
- Cutting the Fabric: Cut the fabric according to your planned measurements. Leave extra fabric for seams and folds if you want to add a hood.
Sewing the Cloak Together
- Assembling the Cloak: Start by stitching the two pieces of fabric together, ensuring to keep the seams neat. If you’re adding a hood, cut a separate piece and sew it onto the cloak.
- Adding Lining: If desired, consider adding a lining to your cloak. This can enhance the comfort and appearance of your costume. Opt for a contrasting color for a fun surprise when the cloak is open.
Finishing Touches
- Hemming the Edges: Hem the edges of the cloak to avoid any raw seams. This detail adds to the overall quality of your final piece.
- Adding a Closure: Consider adding a decorative pin or clasp to keep the cloak in place. A simple ribbon tied around the neck offers both charm and practicality.
Style the Hood (If Applicable)
- Creating the Hood: If you added a hood, ensure it’s comfortably fitted. It should fall gracefully without obstructing your view.
Having a stunning red cloak completes your easy red riding hood costume and gives it a sense of authenticity and charm.
Accessorizing Your Easy Red Riding Hood Costume
Once the essentials are complete, you can focus on adding accessories that enhance your red riding hood costume. Here are some key accessories to consider:
The Iconic Basket
- Wicker Basket: A small wicker basket adds flair, making the character more recognizable. Consider filling it with props like faux bread, flowers, or other items that fit the storyline.
Footwear
- Comfortable Shoes: Select footwear that aligns with the fairy tale style while being comfortable. Classic Mary Janes or ankle boots can work beautifully.
Jewelry
- Subtle Pieces: Adding simple jewelry, such as a charm bracelet or pendant, can enhance your character’s femininity without overwhelming the look. Consider charms that resonate with the story, such as hearts or flowers.
Hair Accessories
- Headband or Ribbon: Incorporate a red ribbon or flower crown to add a whimsical touch to your hairstyle. This detail can tie your entire costume together.
Optional Props
- Toy Wolf: If you want to take a fun twist on the character, consider carrying a plush toy wolf as a humorous accessory. This adds an interesting narrative dimension to your costume.
- Treasure Map: You could create a faux treasure map as an amusing prop. This nods to the adventurous spirit, enhancing your character portrayal.
By incorporating these accessories, you’ll elevate your easy red riding hood costume DIY, making it memorable and visually captivating!
Hair and Makeup to Complete Your Look
To truly embody the character of Red Riding Hood, hairstyles and makeup play essential roles in your overall presentation. Here are tips to enhance your final look:
Hairstyling Techniques
- Loose Curls: Opt for loose, natural curls that embody a fairy-tale look. This hairstyle evokes the beauty and simplicity of the character.
- Braids: Consider adding one or two simple braids to give your hairstyle a playful appeal. This style can keep hair tidy while contributing to a whimsical aesthetic.
Hair Accessories
- Ribbons and Flowers: Use ribbons that match your outfit to create a charming bow in your hair. Adding flowers, such as wildflowers or daisies, can enhance the overall theme.
Makeup Techniques
- Natural Look: Go for a fresh and natural look for your makeup. Apply light foundation or BB cream to create an even base.
- Emphasize Eyes: Use soft, earthy tones for your eye makeup to highlight your features. Natural-looking eyeliner can enhance your eyes without overpowering the overall look.
- Cheek Color: A touch of blush will add a youthful glow to your cheeks, enhancing the character’s innocent charm.
- Lip Color: Opt for a gentle pink or a natural tone that reflects femininity without being overwhelming. A soft gloss can add a fresh finish.
Practice Your Look
Make sure to practice your hairstyle and makeup before the big day. This ensures you feel confident and prepared to embody Red Riding Hood fully.
By utilizing these hair and makeup techniques, you will achieve a captivating portrayal of Red Riding Hood that complements your costume beautifully!
Tips for a Successful Red Riding Hood Costume Experience
Creating a remarkable red riding hood costume can be a rewarding journey, but there are some essential tips that can enhance your overall experience:
Start Early
Don’t wait until the last minute to begin your costume project. Starting early allows you ample time to gather materials, craft your costume, and make necessary adjustments.
Set a Budget
Define a budget for your costume to help manage expenses effectively. Knowing your financial limits allows you to prioritize essential materials without overspending.
Collaborate with Friends
Invite friends or family members to help with your project. Collaborating can inspire creativity and make the costume-making process more enjoyable.
Stay Open to Flexibility
Remain flexible as you work on your costume. If you discover new ideas or materials, allow yourself to modify your designs and embrace those changes.
Celebrate Achievements
After completing your costume, take a moment to celebrate your hard work! Acknowledge the time and effort spent crafting and recognize the joy it brings.
By following these tips, you’ll enhance your Red Riding Hood costume DIY experience from beginning to end!
Showcasing Your Red Riding Hood Costume
Once your easy red riding hood costume is complete, it’s time to showcase your hard work! Here are some suggestions for presenting your costume effectively:
Attend Themed Events
Wear your costume to events like Halloween parties, cosplay conventions, or themed gatherings. Engage with fellow attendees to immerse yourself in the lively atmosphere.
Organize a Creative Photoshoot
Consider arranging a fun photoshoot to showcase your completed looks. Select scenic backdrops that resonate with the fairy-tale aesthetic to capture stunning images.
Utilize social media platforms to highlight your costume! Document your process, from material selection to the final look, and connect with fellow fans through relevant hashtags.
Engage with Others
Participate in gatherings where you can showcase your costume and meet other fans. Share ideas and stories that celebrate your shared interests in the Red Riding Hood character.
Capture the Experience
Take time to appreciate your efforts and the creativity that went into your costume. Reflect on the journey and happily share compliments and experiences with others.
By effectively showcasing your Red Riding Hood costume, you not only celebrate your work but also inspire others to embark on their DIY projects!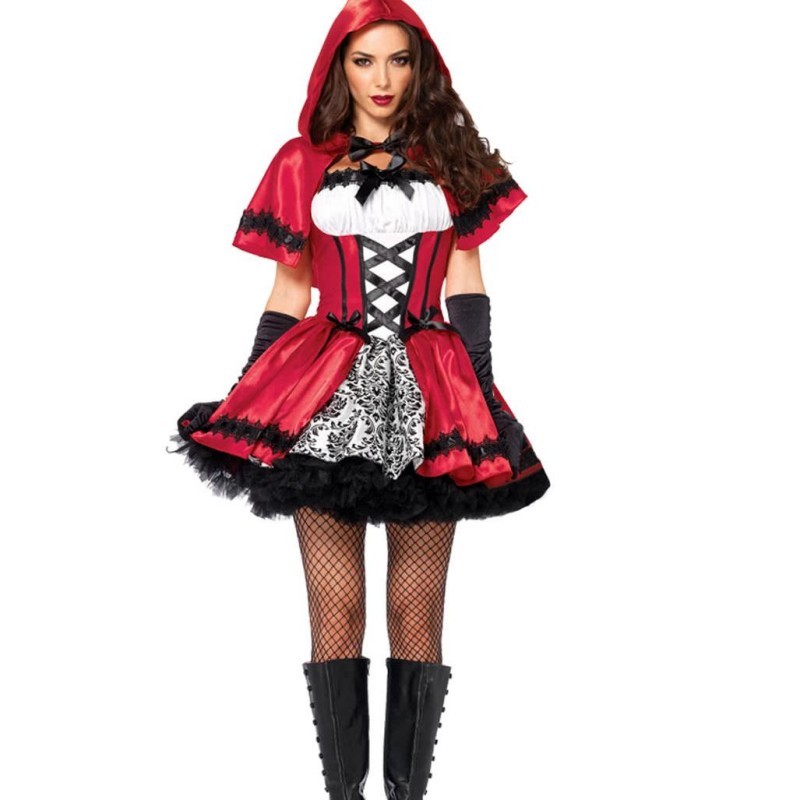
Conclusion: Embrace Your Adventure as Red Riding Hood
In conclusion, crafting an easy red riding hood costume DIY is a creative endeavor that allows you to express yourself while embracing the beauty of storytelling. With the appropriate materials, design elements, and accessories, you can construct a costume that reflects the essence of this beloved character.
This comprehensive guide has provided insights and tips on fabric choices, sewing techniques, and styling details, aiding you as you create your interpretation of Red Riding Hood. Remember, this journey is about celebrating creativity, individuality, and the spirit of adventure.
As you step into your role as Red Riding Hood, take pride in the character you embody and the effort you’ve invested in bringing her story to life. With your costume complete, embark on new adventures and create lasting memories that will be cherished.
Happy crafting, and may your experience as Red Riding Hood be filled with fun and excitement!