Contents
- 1 Introduction to Robin Costumes: Why Go DIY?
- 2 Materials List: What You’ll Need
- 3 Step-by-Step Instructions for Making a Robin Mask
- 4 Creating the Iconic Robin Vest: Tips and Techniques
- 5 Sewing the Perfect Robin Gloves and Boots
- 6 Adding the Finishing Touches: Belt and Cape
- 7 Sourcing the Right Fabrics and Colors
- 8 Maintenance and Care for Your Robin Costume
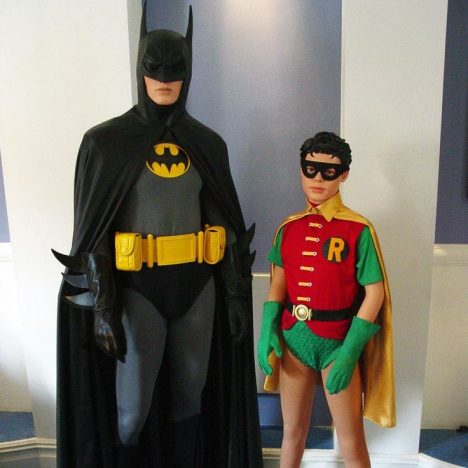
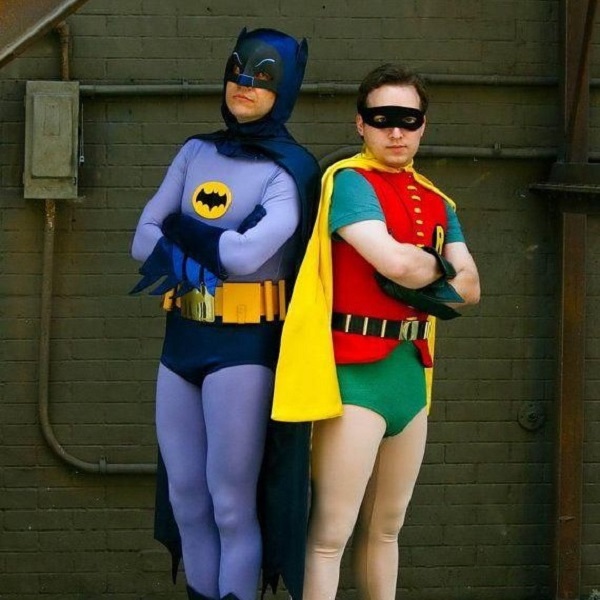
Introduction to Robin Costumes: Why Go DIY?
Dressing up as Robin, the iconic sidekick from the Batman series, is a popular choice for many costume events. The vibrant colors and distinctive elements of the robin costume make it a standout option. But, why should you consider going the DIY route instead of buying a premade outfit?
First, creating your own robin costume allows for customization. You can tailor every aspect of the costume to fit your preferences and body shape. Besides personalization, going DIY can also be more budget-friendly. Prepackaged costumes can be expensive and may not offer the best quality. By choosing your own materials, you can control the cost and ensure high-quality finishes.
Moreover, the process of making a robin costume can be a fulfilling project. It gives you a chance to develop new crafting skills or refine existing ones. The pride of completing a costume from scratch is an enriching experience.
Lastly, DIY costumes often score extra points for originality at events. A handmade robin costume can showcase your creativity and stand out in a sea of mass-produced outfits. So, if you’re driven by the desire for a custom look, the joy of crafting, or the sense of accomplishment that comes with DIY, making your own Robin costume is an excellent choice.
Materials List: What You’ll Need
Before diving into the creation of your robin costume, let’s gather the necessary materials. A well-prepared materials list will make the process smoother and help you avoid hiccups along the way. Here’s what you’ll need to create a vibrant and authentic Robin costume:
- Fabric: Opt for stretchy, comfortable materials in red, green, yellow, and black to match Robin’s iconic color scheme.
- Mask Template: You can create your own or find a printable online to ensure accurate shaping.
- Sewing Kit: This should include needles, thread in the colors of your fabric, fabric scissors, and pins.
- Foam Sheets or Felt: These are for the mask and potentially for adding details like the ‘R’ logo.
- Craft Glue: Needed for attaching pieces that can’t be sewn, such as foam details.
- Velcro or Zippers: Choose based on what will be most comfortable and practical for your costume openings.
- Boots and Gloves: Pick up some basic ones that you can customize with fabric to match your suit.
- Belt Materials: You can use fabric or purchase a plain belt to embellish with craft materials.
- Paint or Fabric Markers: Use these for detailing and adding the finishing touches to your robin costume.
Make sure you have all of these items in hand before you begin constructing your costume to enjoy a seamless crafting experience. And remember, taking the time to find just the right shades and textures will add authenticity to your Robin costume, making it not just a costume, but a stand-out piece at any event.
Step-by-Step Instructions for Making a Robin Mask
Making a Robin mask is key to capturing the character’s mystique. Follow these simple steps, and you’ll have an impressive mask in no time.
- Get Your Mask Template: Find a printable template or draw one yourself. It should mirror Robin’s eye mask shape.
- Trace the Template: Place your template over a foam sheet or piece of felt. Use a marker to trace it. Make sure your materials are in black for authenticity.
- Cut the Mask: Carefully cut along the outline with fabric scissors. Precision is important for a clean look.
- Adjust for Comfort: Place the cutout on your face. Mark areas that need small cuts for better fit around the nose and eyes.
- Add Holes for String: Punch two small holes at the sides of the mask. These are for attaching a string or elastic band.
- String It Up: Thread a comfortable string or elastic through the holes. Ensure it fits snugly but doesn’t pinch.
- Final Touches: If your robin costume requires, glue on the ‘R’ logo or additional details to your mask. Use craft glue for a strong hold.
With these steps, you will add a vital component to your robin costume with a personal touch that store-bought masks lack. Using the right materials and a bit of patience, your mask will look both professional and unique.
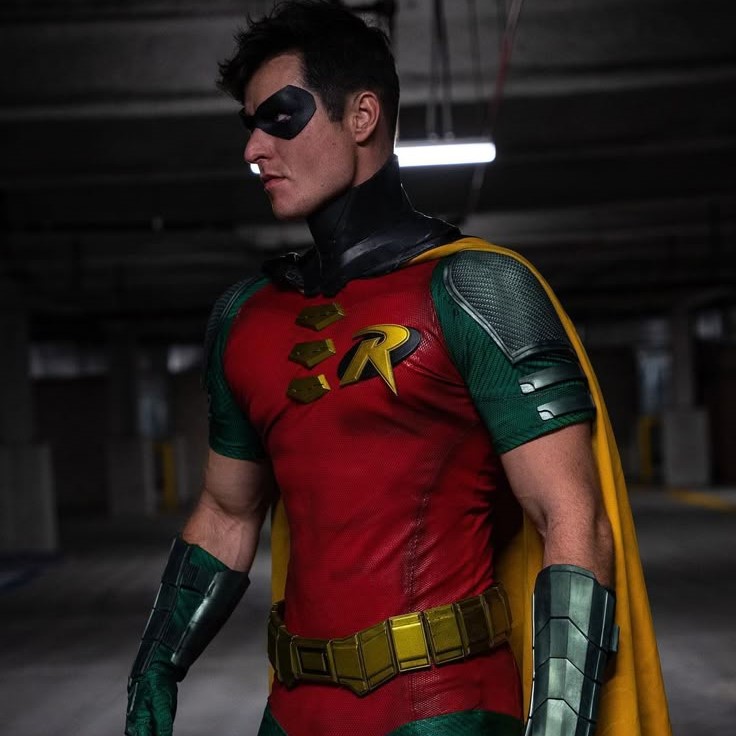
Creating the Iconic Robin Vest: Tips and Techniques
The Robin vest is a central piece of the robin costume, instantly recognizable with its bold colors and unique design. To create this signature piece, follow these key tips and techniques:
- Choose the Right Fabric: Select a stretchable, comfortable fabric that matches the red and green color scheme of Robin’s outfit.
- Create a Pattern: Measure yourself accurately and sketch a pattern on paper. Adjust the pattern for a snug, yet comfortable fit.
- Cutting the Fabric: Once satisfied with your paper pattern, transfer it to your fabric and carefully cut out the pieces.
- Sewing it Together: Sew the front and back pieces together. Remember to leave openings for the arms and neck. Use a sewing machine for a clean, durable stitch.
- Add the ‘R’ Logo: Cut out the ‘R’ logo from your foam sheets or felt. Attach it to the left side of the chest using craft glue or a fabric marker.
- Hemming: Hem the edges for a polished look. Pay special attention to the armholes, neck, and bottom of the vest.
- Velcro or Zipper: Attach Velcro strips or a zipper on the back or side of the vest for easy wear.
By following these steps, you’ll be able to craft a Robin vest that not only looks great but also feels good to wear. Keep your movements in mind as you’re constructing the vest; it should be sturdy but also flexible enough to allow for action-packed poses!
Sewing the Perfect Robin Gloves and Boots
Creating the perfect Robin gloves and boots is critical for completing your Robin costume. These accessories can add a touch of authenticity and are essential for the overall look. Here are some instructions to help you sew Robin-inspired gloves and boots effectively:
- Select the Proper Materials: Choose stretch fabric that complements the red and green scheme of your Robin costume.
- Pattern the Gloves: Trace your hand on paper to create a pattern. Add seam allowance around the edges.
- Cut the Fabric: Using the pattern, cut the fabric for both gloves. Ensure each hand’s pieces match.
- Sew the Gloves: Carefully sew the pieces together. Start from the fingertips and work your way down to the wrist.
- Create Glove Details: If you want to add details, such as the classic green accents or cuffs, cut them out and sew them onto the gloves.
- Boot Covers: To make the boots, measure your legs and feet to create a pattern for fabric boot covers that can be worn over your shoes.
- Assemble the Boot Covers: Sew the cut fabric pieces together, starting from the toe and moving up the leg.
- Add Boot Details: Use paint or fabric markers to add any logo or design. You can also attach additional pieces, like a cuff, using craft glue.
- Secure the Covers: Attach Velcro strips to make them easy to wear and adjust.
Crafting the gloves and boots with attention to detail will contribute significantly to the overall impact of your Robin costume. Ensure you test the comfort and fit as you go, so you have full mobility when wearing your costume. Remember to keep the colors consistent with Robin’s iconic look.
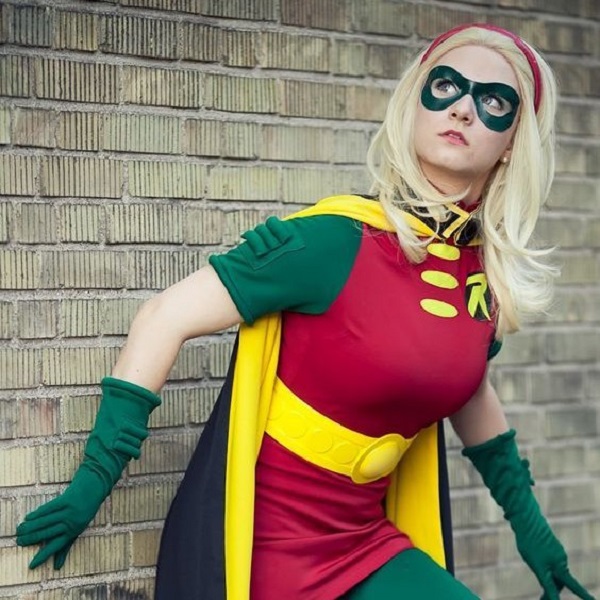
Adding the Finishing Touches: Belt and Cape
Every Robin costume needs a belt and a cape to complete the iconic look. These finishing touches tie the entire outfit together and add an extra layer of authenticity. Follow these simple steps to add the perfect belt and cape to your robin costume.
- Belt Construction: Start by measuring your waist to determine the length of your belt. Choose a thick, yellow fabric or purchase a plain belt that you can cover or paint. Cut the fabric to the correct length and width, then attach it around a buckle. Secure the belt with fabric glue, or hand-sew it for a more durable finish. Add pouches or craft a ‘utility’ look if desired.
- Cape Crafting: The cape adds dramatic flair and is essential for Robin’s image. For the cape, select a lightweight fabric that drapes well, like polyester or satin, in a bright yellow. Measure from the nape of your neck to the desired length, considering the cape should flow behind you but not drag on the ground. Cut the fabric in the shape of the cape, with a slightly curved bottom for a natural flow. Hem the edges to prevent fraying. Attach the top of the cape to a collar or directly to the vest of your costume using velcro or snaps for easy removal.
With a well-crafted belt and a flowing cape, your robin costume will look as though it leaped straight out of the comics. Remember to move around in your costume to ensure the belt and cape are secure and comfortable. Now, your DIY Robin costume is nearly complete and ready to turn heads.

Sourcing the Right Fabrics and Colors
Sourcing the right fabrics and colors is crucial for a high-quality robin costume. To start, visit fabric stores both in-person and online. Look for stretchy, durable materials. You need red, green, yellow, and black to match Robin’s iconic look.
- Red Fabric: Aim for deep, vivid red. This is for the vest and emblem. It draws the eye and defines the costume.
- Green Fabric: Choose a vibrant green for accents on the gloves and boots. It should contrast well with the red.
- Yellow Fabric: The yellow is for the cape and belt. It needs to be bright to stand out.
- Black Fabric: Black creates the base for the mask and also works for other details. Make sure it complements the costume without overpowering the other colors.
Next is texture. The fabrics should be comfortable and flexible. They must allow you to move freely. Stretch materials like spandex or lycra are best for body suits. These fabrics can endure a lot of wear and still look great.
Also, look for washable fabrics. Your robin costume may need cleaning after events. You want it to remain vibrant after each wash. Opt for materials that don’t fade or fray easily.
Remember, picking the correct shades is key. Robin’s costume is famous for its specific color palette. Slight variations can make a big difference in authenticity. Take the time to compare shades and find the best match. Bring images of Robin to help.
Lastly, keep your budget in mind. Compare prices and consider sales or discounts. Sometimes buying in bulk can save money. Be smart and cost-effective while choosing your materials.
When you find the right fabrics and colors, your robin costume will look genuine and impressive. It will show your attention to detail and dedication to the craft.
Maintenance and Care for Your Robin Costume
Once you’ve crafted your robin costume, proper maintenance and care are essential to keep it looking its best. Here are some tips to help you preserve your costume for future events:
- Clean with Care: After each use, carefully clean any stains or dirt from your costume. For most fabrics, a gentle hand wash with cool water and a mild detergent works well. Avoid harsh chemicals that could damage the fabric or alter the colors.
- Storing Correctly: Store your robin costume in a cool, dry place. Hang it up if possible to prevent wrinkles, or fold neatly and place it in a garment bag to keep it dust-free. Make sure the cape and belt lay flat to avoid permanent creases.
- Regular Inspections: Periodically check your costume for any loose threads, tears, or worn areas. Early detection means you can make repairs before they become bigger problems. Sew any detached parts or reinforce areas that endure a lot of movement.
- Avoid Sunlight: When not in use, keep your costume out of direct sunlight. Sunlight can fade fabrics over time, especially the vibrant reds and greens of a robin costume.
- Reinforce Frequently Used Parts: Areas like the elbows, knees, and seams may need extra attention. You can reinforce them with additional stitching or fabric patches to ensure longevity.
By following these maintenance and care instructions, you’ll ensure that your DIY robin costume remains in top condition and ready for action, time after time.