Contents
Introduction
When it comes to creating a standout costume, few characters evoke as much intrigue and fear as The Rake. Originating from urban legends, The Rake is known for its terrifying appearance and chilling presence. In this guide, we will provide design tips for The Rake costume, focusing on how to bring horror to life while ensuring your outfit stands out at any Halloween event. Whether you’re planning for a party, a haunted house, or simply want to make a statement, follow our insights for achieving that perfect eerie look.
What is The Rake?
Origin and Characteristics of The Rake Creature
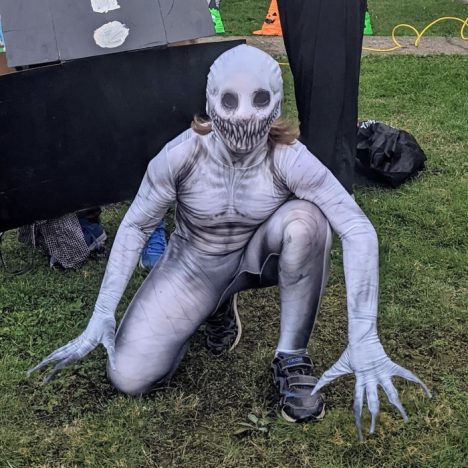
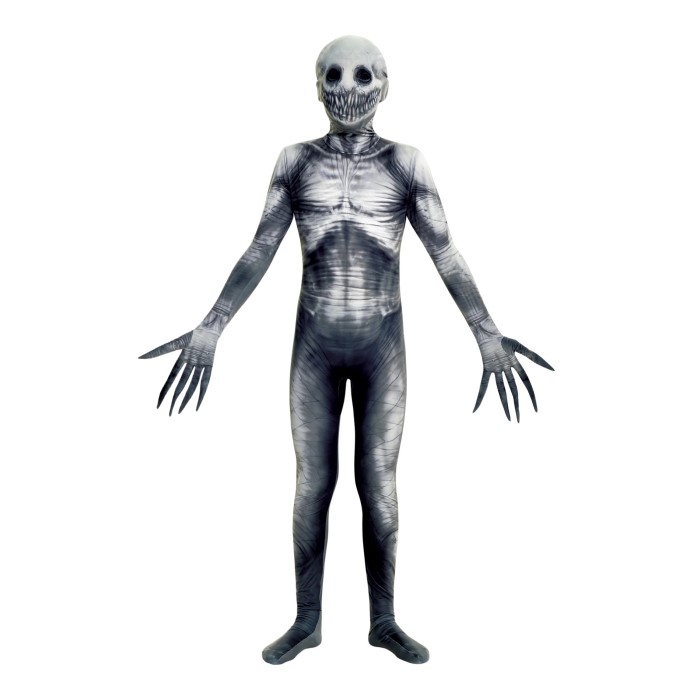
The Rake is a terrifying creature from Internet horror stories known as creepypastas. It first appeared in 2005 and quickly became popular in online scary tales. The Rake is described as pale, emaciated, and humanoid, with sharp claws and haunting eyes. It moves silently and appears in dark places like forests or bedrooms. Its eerie look and predatory behavior make it a chilling figure. These features are key when designing a costume based on The Rake.
Importance of Understanding The Rake’s Appearance for Costume Design
To create a realistic Rake costume, it’s essential to understand the creature’s appearance. Focus on its skinny frame, long claws, and unsettling facial features. Pay attention to its ghostly pale skin and dark, hollow eyes. These elements help replicate the horror The Rake represents. Knowing its origins and traits ensures your costume is realistic and captures the creature’s fearsome essence. This understanding will guide your choices in fabric, makeup, and accessories.
Materials Needed
Fabric and Clothing Essentials
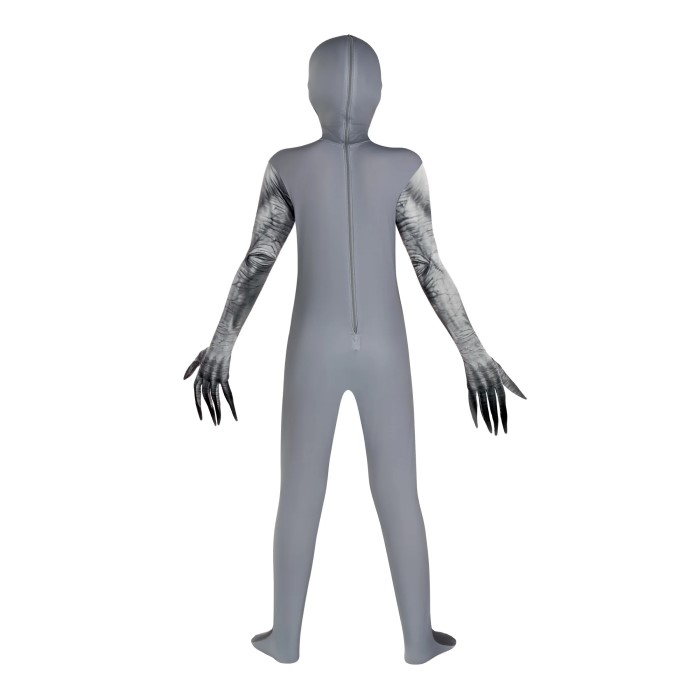
To mimic The Rake’s eerie look, choose lightweight, stretchy fabrics. Thin, distressed materials work best for achieving the creature’s gaunt appearance. Opt for neutral or dark colors like gray, black, or brown to create a grim tone. Use tattered fabrics to give the clothing a worn and ghastly effect. Consider long-sleeved tops and skinny pants to emulate The Rake’s lean frame. Look for materials that move subtly, helping enhance the creepy vibe of the costume.

Prosthetics and Makeup Supplies
Prosthetics and makeup bring The Rake costume to life. Use latex prosthetics for claws, sharp features, and texture effects. Silicone molds can help replicate hollow eyes or scars on the face. Select pale foundation for the ghostly skin tone. Use black and gray makeup for shadows and hollow areas. Invest in quality brushes and sponges for smooth application. Fake blood or stains can add an extra horrifying touch. Special effects makeup kits will also help you achieve a layered, professional look.
Recommended Tools for Costume Creation
The right tools make costume crafting easier. Scissors that can handle fabric and prosthetics are essential. Fabric adhesives like sewing glue or double-sided tape are useful for attaching torn pieces. Use a seam ripper to create controlled tears in clothing. Heat tools like hair dryers can help mold prosthetics. Look for needles and threads to stitch or repair clothing. Prosthetic tools like blending sticks help smooth edges on the face and hands. Include makeup brushes, sponges, and palettes for detailing work.
Designing the Face and Hands
Creating The Rake’s Distinctive Facial Features
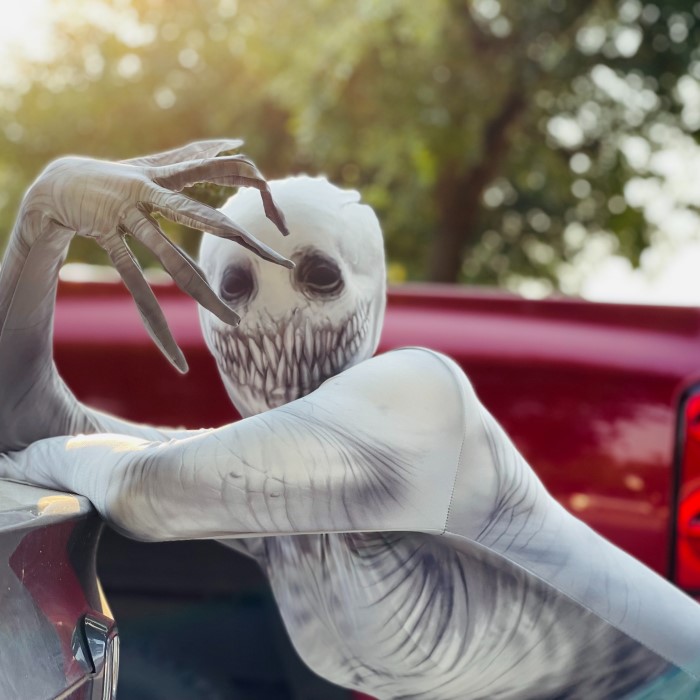
To craft The Rake’s face, focus on its frightening and unnatural look. Start by using pale foundation to match the creature’s ghostly skin tone. Apply dark makeup around the eyes to create hollow, sunken sockets. Add silicone prosthetics or latex molding to enhance cheekbones and create scars or ridges. Use sharp tools to define lines, giving the face a gaunt and skeletal look. Blend makeup carefully to make the features appear seamless. For the teeth, use fake fangs or prosthetics for a monstrous grin. Thin layers of blood or dark stains can complete the chilling, grotesque effect.
Tips for Making Long, Clawed Hands
The Rake’s terrifying claws are essential for its eerie appearance. Use lightweight materials like latex or foam to make claws that are easy to wear. Shape the claws with scissors, ensuring they look sharp but remain safe for movement. Paint the claws in dark or earthy tones, such as black or brown, for a more menacing look. Attach the claws to gloves or directly to prosthetic fingers for a seamless effect. Cover the hands with pale makeup to blend them with the face and arms. Add veins or subtle bruising to mimic The Rake’s emaciated and sinister appearance. Work patiently to ensure everything feels comfortable and stays secure.

Choosing and Preparing the Outfit
Tattered and Eerie Clothing Styles
To replicate The Rake’s sinister appearance, focus on selecting weathered and eerie clothing. Opt for lightweight, distressed fabrics to emphasize the creature’s gaunt frame. Look for garments like long-sleeved shirts and slim pants that hug tightly to the body. Tear and fray the edges of the clothes for a tattered appearance. Use a seam ripper or scissors for controlled cuts, creating the illusion of wear and decay. Incorporate layers like thin shawls or scarfs to add depth. Focus on muted colors such as dark gray, brown, or black to reflect the grim tone. Keep the clothing’s design minimalistic to ensure the ghostly look remains the centerpiece.
Coloring Techniques for a Dark and Grimy Look
Achieving a grimy effect is vital for The Rake costume. Use fabric dyes or paints to darken the clothing. Blend shades of black, gray, and brown for a natural, aged look. Apply the colors unevenly to simulate dirt and wear. Consider using sponges or brushes to dab stains and smudges onto the cloth. Mix in subtle highlights, like lighter grays, to create dimension. Try using fabric-safe powders or sprays for a dusty, decayed texture. Layer the colors and let them dry well before adding more. Stains, such as fake blood splatters or dark grease marks, amplify the eerie details. Keep the overall look dismal yet realistic to embody The Rake’s haunting presence.
Enhancing the Scary Look with Makeup
Makeup plays a crucial role in achieving The Rake’s chilling appearance. By focusing on key aspects such as pale skin effects and gaunt facial features, you can bring authenticity and terror to your costume. These details ensure the creature’s haunting presence stands out.
Applying Pale Skin Effects
Creating The Rake’s pale skin is essential for its ghostly look. Start with a light foundation or white makeup to cover your face, neck, and visible skin. Blend the makeup smoothly to prevent patchiness. Use powders or creams with a matte finish to avoid a shiny appearance. Add subtle gray or blue tones to mimic a corpse-like effect. Apply lightly around joints, such as hands and elbows, for added realism. Match the skin tone to the rest of the costume using makeup on prosthetic parts as well.
Techniques for Hollow Eyes and Gaunt Features
Hollow, sunken eyes are key to The Rake’s unsettling face. First, apply dark shades like black or gray around the eyes. Focus on blending the edges to create depth. Use silicone prosthetics or latex molds to enhance cheekbones for a gaunt, skeletal look. Sharp makeup tools can add defined lines, making the face appear sharper and creepier. Create shadows along the nose and jawline for extra dimension. Finish with subtle smudges or fading to make the features look aged and unnatural. These techniques help craft the fearsome essence that defines The Rake.
Adding Details for Realism
Enhancing realism in The Rake costume elevates its eerie and haunting appearance. Focus on adding small but impactful details. These elements create depth, making your character look thoroughly terrifying. Here are techniques to ensure your costume stands out.
Artificial Blood and Textures
Artificial blood is perfect for adding a chilling, gruesome touch to your costume. Use fake blood sparingly on clothing, claws, and facial prosthetics. Smear or drip it irregularly for a realistic appearance. To create textures, apply layers of materials like latex or silicone on clothing or skin. Use rough tools like sponges to create bumps, scars, or decayed textures. Blend dark shades and stains onto textured areas to mimic bruises or abrasions. Focus on subtle layering to prevent the costume from looking overly artificial.
Incorporating Subtle Effects like Dirt or Rips
Subtle effects like dirt or rips bring a natural, worn look to The Rake costume. Rub darker powders or sprays on edges of clothing to create dirt marks. Use a toothbrush or sponge for fine smudges on fabric and skin. Add tears strategically in clothing with scissors or a seam ripper, avoiding excessive damage. Apply mixed shades of gray and brown around the rips for added dimension. Enhance dirt effects around the knees, elbows, or claw marks for realism. Concentrate on balance; these details should complement the creepy design without overwhelming it.
Safety Tips for Wearing Costume
Safety is essential to fully enjoy your Rake costume. Follow these tips to avoid discomfort or injury.
Ensuring Mobility and Comfort
- Choose lightweight materials: Use lightweight fabrics and prosthetics to keep movements easy and unrestrained.
- Test the costume in advance: Wear it for a few minutes before the event to check mobility.
- Ensure proper fit: Tight or ill-fitting costumes may restrict movement and cause discomfort.
- Focus on breathable fabrics: Avoid overheating by using breathable materials for clothing and gloves.
- Maintain visibility: Make sure prosthetics or makeup around the eyes do not block your vision.
Handling Sharp Elements Carefully
- Use soft materials for claws: Choose foam or latex for claws to ensure they are sharp-looking but safe.
- Secure sharp components: Attach claws securely to gloves or prosthetics to prevent accidental detachment.
- Avoid pointed edges near the face or body: Inspect costume elements to ensure no sharp edges can cause injuries.
- Practice cautious movements: Be mindful of your surroundings to avoid scraping objects or other people.
- Carry a small repair kit: Keep adhesives or tape handy in case something becomes loose during use.
By focusing on these safety tips, you’ll ensure your Rake costume is both realistic and practical for any event.
Showcasing The Rake Costume
After completing your Rake costume, it’s important to showcase it effectively. Presentation adds to the overall impact and highlights your efforts. Paying attention to photography and performance will make your creation stand out.
Best Practices for Photography and Lighting
- Choose a spooky environment: Select locations like dark forests or dimly lit rooms for authenticity.
- Use dramatic lighting: Accent your costume with low, angled lights to create shadows and eerie effects.
- Avoid overexposure: Soft or diffused lighting ensures the details of your costume remain clear.
- Play with color tones: Use green, blue, or gray filters for a haunting atmosphere in photos.
- Experiment with poses: Strike creepy, exaggerated poses to embody The Rake’s sinister essence.
- Focus on fine details: Close-up shots of claws, makeup, or scars amplify the realism of your work.
- Use a tripod: Stabilize your camera for clear, high-quality images even in low light.
- Edit carefully: Enhance photos post-shoot to emphasize shadows or add subtle spooky effects.
Tips for Creating a Memorable Impression
- Embody The Rake’s movement: Practice slow, deliberate, and predatory movements to stay in character.
- Use sound for impact: Add growls, hisses, or silent, unsettling gazes during your presentation.
- Take group photos: Standing near normal characters amplifies your eerie look through contrast.
- Add props: Incorporate items like broken branches or dim lanterns to enhance the scene.
- Engage an audience: React to onlookers by staring or reaching out to unsettle them deeply.
- Act in character: Avoid talking out of character to maintain the fearsome aura of The Rake.
- Test your routine: Practice your performance to ensure seamless execution on the showing day.
By applying these strategies, you’ll effectively showcase your Rake costume and leave a lasting impression.
Conclusion
Creating a The Rake costume offers a fantastic opportunity to showcase creativity while embracing horror. By following these design tips, you can successfully bring this terrifying character to life. Remember, your intention should be to evoke fear and intrigue while also enjoying the process of costume creation. Incorporate different elements to make your Rake costume unique, and prepare to impress at any Halloween gathering. With careful planning and attention to detail, you’ll master The Rake with ease.