Contents
Introduction to Springtrap Character
Overview of Springtrap in the Five Nights at Freddy’s franchise
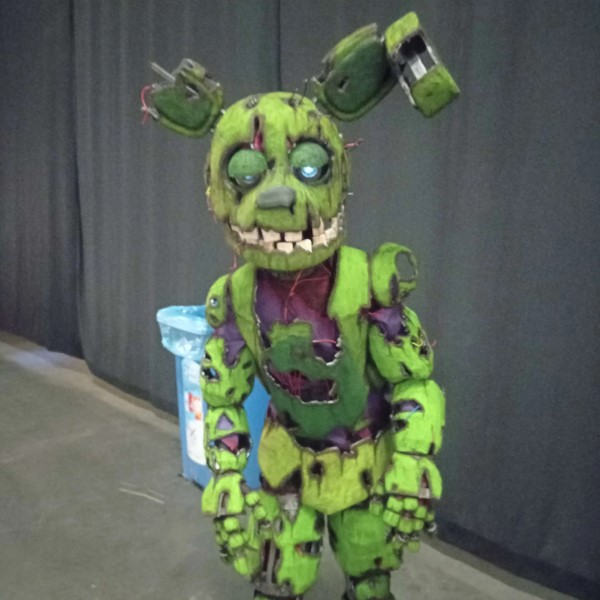
Springtrap is one of the most iconic characters from the Five Nights at Freddy’s series. He first appears in Five Nights at Freddy’s 3 as a decaying animatronic bunny. Known for his creepy and horrifying design, Springtrap is actually possessed by the twisted spirit of William Afton, the main antagonist of the series. Springtrap cosplay is a damaged animatronic with exposed wires and tattered green-yellow fur. His unsettling appearance and backstory make him a frightening yet fascinating character. Gamers are often captivated by his connection to the dark lore of the Five Nights at Freddy’s series. This combination of horror and mystery has solidified Springtrap as a fan-favorite character.
Why Springtrap is a popular choice for cosplay
Springtrap draws attention due to his eerie and unique design. Cosplayers are attracted to the challenge of replicating his creepy look and chaotic details, like broken parts, exposed wires, and the decayed suit.
Additionally, his significance in the Five Nights at Freddy’s storyline makes him even more appealing to fans. Cosplayers enjoy embodying such a mysterious character at conventions and events. The blend of mechanical and horror elements in his design offers a rare opportunity for creativity and craftsmanship.
Overall, these features make crafting and wearing a Springtrap cosplay incredibly rewarding for fans of the franchise.
Designing a Springtrap Cosplay
Essential elements of Springtrap’s design
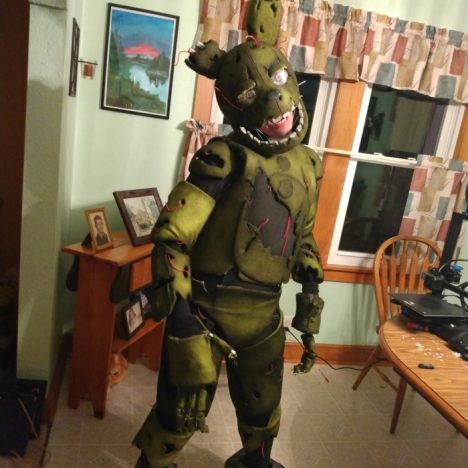
Springtrap’s design is both eerie and intricate, making it stand out in cosplay. Key elements to include are his tattered green-yellow suit and exposed endoskeleton. Broken parts and hanging wires add to the worn-down and damaged look. His face is crucial, featuring cracks, sharp teeth, and hollowed-out eyes for that haunting gaze. To stay true to the character, pay attention to his asymmetrical injuries and decay details.

Materials needed for creating a costume
Creating a Springtrap cosplay requires careful material selection. Foam is ideal for the suit structure and head. Use craft foam or EVA foam, which is lightweight and malleable. Acquire paints in green, yellow, black, and brown for the decayed look. Hot glue and super glue are essential for assembling parts. Fabric or mesh can be used for areas like the exposed endoskeleton or damaged sections. Wires and small electronic components can bring detail to the animatronic elements.
Tips for achieving an authentic appearance
Start by studying reference images of Springtrap from the Five Nights at Freddy’s franchise. Build the suit in layers to mimic his torn design. Enhance the deteriorated effect by incorporating texture—it can be achieved using sponges or brushes while painting. Weather the costume with dark paints to add dirt, grease, and age. Add exposed wires in the appropriate places and make sure the mask has prominent facial details like cracked edges. Pay attention to proportions, ensuring the suit feels bulky and mechanical, and avoid forgetting the eerie, creepy essence that defines Springtrap.
Crafting Springtrap’s Mask and Headpiece
Step-by-step guide to creating the mask
To craft Springtrap’s mask, start with a sturdy base. EVA foam works well for shaping the mask. Cut the foam to fit the general dimensions of Springtrap’s face. Pay close attention to his unique features, like the hollowed eyes and jaw structure. Use reference images from the Five Nights at Freddy’s game.
Once the base is ready, add layers for depth and details. Attach smaller foam pieces to build the sharp teeth and cracks. Secure these pieces with hot glue or similar adhesives. When the structure is complete, sand the edges for smoothness. This ensures the mask appears natural when worn.
Next, paint the mask to capture Springtrap’s eerie color palette. Use green shades with touches of brown and yellow for a decayed look. Sponge or stipple the paint for texture. Black paint can highlight cracks and shadows, emphasizing his horror-like appearance. Allow time for the paint to dry before adding finer details.
Finally, ensure comfort when wearing the mask. Add padding or fabric on the inner side. Attach elastic straps for easy fitting and adjustability. This allows the mask to stay secure during events or performances.
Adding details like cracks, wires, and textures
Details make Springtrap’s mask stand out. Start by adding cracks and scratches. Use a knife or crafting tool to carve these imperfections into the foam. Brush darker paint into the carvings for definition.
Incorporate wires for authenticity. Use thin electrical wires or craft wires to resemble exposed animatronic parts. Place them randomly around the edges and openings of the mask. Secure them with glue, ensuring they stay intact when handling.
Textures elevate the mask’s realism. Add rough areas using textured paint or sponge techniques. Focus on spots like the edges and areas surrounding the cracks. Dust or smear brown and black paint for a worn and distressed effect.
These efforts make your Springtrap mask visually striking and true to the character’s eerie presence.
Building Springtrap’s Suit
Crafting Springtrap’s suit is a major step in creating a standout cosplay. His suit reflects damage, decay, and animatronic features, all of which must be carefully replicated. Follow the techniques below to construct an authentic and detailed suit.
Techniques for constructing the suit
- Use a sturdy base for the suit: Start with a bodysuit or overalls as the foundation.
- Shape with foam: Use EVA foam to create the bulk of the animatronic parts. Cut and shape it into segments that mimic Springtrap’s appearance.
- Create individual panels: Build sections like arm braces, leg coverings, and torso pieces individually for better movement.
- Attach with care: Use Velcro, straps, or lightweight adhesives to secure pieces to the base suit.
- Add layers: Overlap foam panels for a more 3D, mechanical look.
- Ensure mobility: Keep joints flexible to allow natural movement.
Ideas for creating the torn and worn effect
- Tear edges: Cut foam edges jaggedly to match the ripped effect of Springtrap’s suit.
- Burn textures: Use a wood-burning tool for rougher surfaces or battle-like scars.
- Incorporate fabric layers: Add frayed fabric patches to reflect his decayed appearance.
- Use distressing tools: Sandpaper or wire brushes can create a worn-down look.
- Paint weathering: Apply dark and muted tones for dirt, grease, and aging effects.
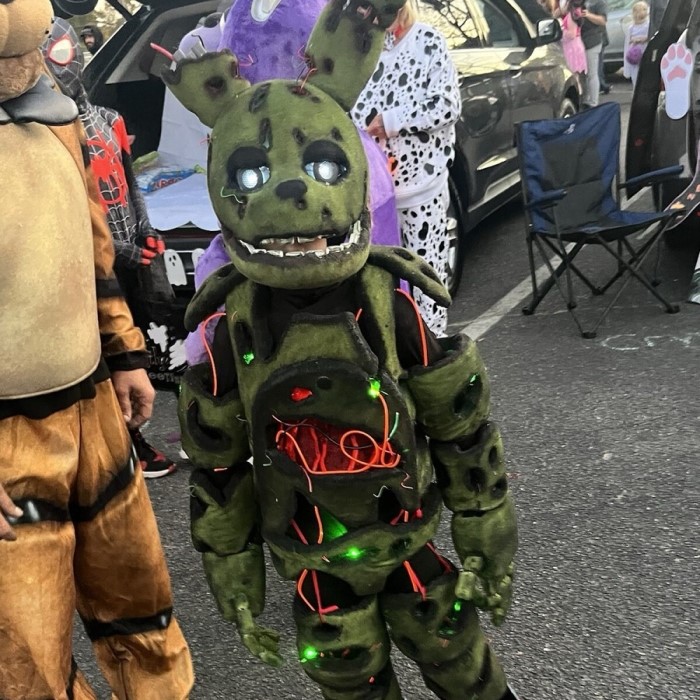
- Add exposed materials: Showcase details like wires and foam indicating his broken-down state.
Incorporating joints and animatronic features
- Create joint structures: Use PVC pipes or flexible plastic for the arm and leg movements.
- Add wires: Place visible wires around the knees, elbows, and torso to enhance the animatronic look.
- Simulate mechanical parts: Use painted foam shapes to resemble gears, screws, or hinges.
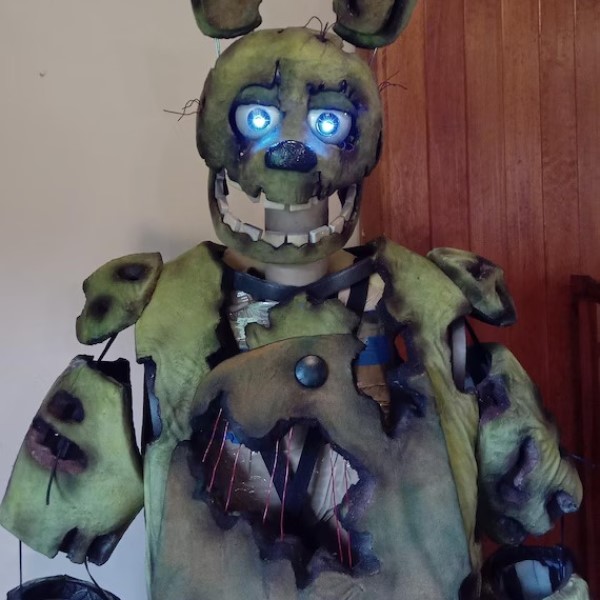
- Build a movable jaw: Attach a moveable jaw hinge to the mask for added character.
- Consider lighting: Install small LED lights inside the suit to mimic malfunctions or glowing effects.
With these methods, you’ll create a suit that’s accurate, sturdy, and captivating. The combined worn and mechanical aesthetics ensure authenticity and bring Springtrap to life for every fan event or cosplay occasion!
Finishing Touches for Your Springtrap Cosplay
Painting and weathering techniques
Once your Springtrap cosplay is fully built, focus on painting and weathering for the final touches. Start by using spray paints or brushes to apply a base coat in shades of green and yellow. Add layers of darker tones like brown and black to mimic dirt and decay. Use a sponge or dry brushing to create realistic textures. Highlight edges and cracks with black paint to make details stand out. For a more aged look, apply small amounts of gray or white paint to resemble dust and wear.
To enhance the weathered appearance, add intentional imperfections. Splatter diluted black paint for stains or smudges. You can also lightly sand some painted areas to expose the foam or base beneath, imitating chipped paint and damage. Seal your work with a matte finish spray to protect the layers and achieve a natural, aged effect.
Adding accessories and props
Accessories elevate your Springtrap cosplay and make it feel complete. Attach dangling wires and small electronics to emphasize animatronic details. Use old cables or craft wires for an authentic look. If feasible, include small LED lights to simulate a glowing or malfunctioning effect in various parts of the costume.
Consider adding props that suit Springtrap’s creepy theme. A haunted pizzeria sign or a replica of the Five Nights at Freddy’s security mask can help tell the character’s story. Think about carrying small items that represent the eerie atmosphere, such as fake bloodstains, handcuffs, or broken animatronic parts. These elements will make your cosplay more immersive and eye-catching in events or photos.
Tips to enhance the character’s worn-down aesthetic
To fully embody Springtrap, focus on enhancing the worn-down and terrifying elements of the costume. Layer dirt-like textures on the whole suit and mask. Incorporate torn fabrics or mesh to accentuate the decayed look. Unkempt and frayed edges on the costume add authenticity.
Add movement to your cosplay to mimic Springtrap’s erratic and menacing behavior. Practice slow, jerky movements as if your animatronic parts are malfunctioning. Test different low-pitched vocal sounds or use creepy audio effects to mimic Springtrap’s eerie persona.
Emphasize the distinctive features of Springtrap, such as his hollow eyes and prominent sharp teeth. Ensure these stand out as key focal points of your costume. Paying attention to these final details will make your Springtrap cosplay appear more professional and authentic.
Showcasing Your Cosplay
Tips for presenting your costume at events
Prepare well before showcasing your Springtrap cosplay at events. Test your costume thoroughly for durability and comfort. Ensure that all elements, like the mask, suit, and props, are working and securely attached.
Showcase your cosplay in an organized manner. Find a spot with good lighting to highlight your costume’s details. If you have LED features in the suit, test them in advance to ensure they function properly during the event.
Bring items to complement your cosplay. This can include props like animatronic pieces or themed signs. These enhance the storytelling and make your character more recognizable.
Engage with attendees by answering questions or explaining your cosplay creation process. Be approachable and share insights—fans often appreciate learning about how costumes are built.
Consider participating in cosplay competitions. Prepare a routine or brief narrative about Springtrap to impress judges and spectators. Showcase your cosplay with confidence and enthusiasm to stand out.

Posing and acting as Springtrap to captivate viewers
Focus on capturing Springtrap’s eerie presence with poses and movements. Practice slow, jerky movements like a malfunctioning animatronic. Keep movements dramatic and unsettling; this enhances the creepy factor of your cosplay.
Use dynamic and recognizable poses to imitate Springtrap from the game. For example, leaning forward with sharp claws out or menacing stances. Practice standing in eerie, motionless poses for added intensity.
Enhance your performance by embodying Springtrap’s character. Use guttural or low-pitched sounds to mimic a broken voice. Avoid speaking too clearly; create an unsettling aura with minimal, robotic phrases.
Focus on your expressions, mostly through the mask and body language. Use hollow stares from the mask’s eyes and careful gestures.
Interact with viewers cautiously and in character. Slowly approach them or react like an animatronic, staying true to Springtrap’s persona. These elements will leave a lasting impact on fans and event attendees.
Where to Find Springtrap Cosplay Inspiration
Exploring resources and communities is essential for finding stellar Springtrap cosplay inspiration. Whether you’re a beginner or experienced creator, these platforms provide valuable ideas and tips. Dive into online forums, video platforms, and social media to discover knowledgeable creators and captivating designs.
Online communities and resources for cosplay ideas
- Cosplay Subreddits: Subreddits like r/cosplay offer detailed posts on costume-making techniques.
- Cosplay Facebook Groups: Join groups where fans share images, tutorials, and feedback.
- Discord Servers: Cosplay-focused servers can connect you with others crafting Springtrap outfits.
- Pinterest Boards: Search Springtrap cosplay boards for visual guides and photos.
- Video Tutorials: Look for crafting guides on YouTube, covering mask-making and suit construction.
These communities let you connect with people who share your interest. Engaging with others may spark fresh ideas for your cosplay.
Popular Springtrap cosplayers and creators
- Notable Cosplayers: Search for well-known creators who specialize in animatronic-themed costumes.
- Instagram Accounts: Many creators post progress shots, offering insight into building their suits.
- YouTube Channels: Some cosplayers document their entire process, presenting step-by-step instructions.
- Convention Highlights: Watch event showcases featuring detailed Springtrap cosplay.
Pay attention to innovative designs and techniques used by expert cosplayers. Their skills can inspire creativity for your own Springtrap project. Combine ideas from various creators to make your costume unique and true to the character.