
Contents
Introduction
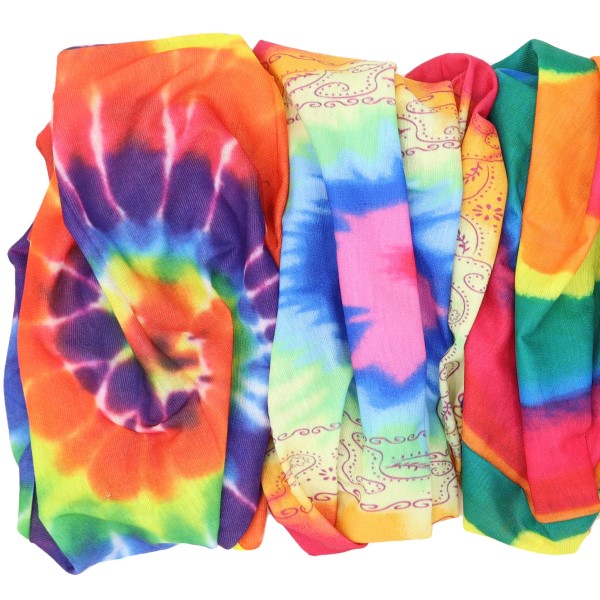
The art of bandana tie dye has been a beloved way to express personal style for decades. This vibrant and playful technique has evolved into a fashionable trend that constantly reinvents itself. As we head into summer 2026, bandana tie dye finds itself at the forefront of fashion, offering endless possibilities for customization. From casual accessories to standout statement pieces, the potential of tie dyeing bandanas is vast. This article will explore various bandana tie dye techniques, exciting bandana tie dye patterns, and enough bandana tie dye ideas to inspire your next DIY project. Whether you are wondering how to bandana tie dye or simply looking for inspiration, this guide has you covered.
The Appeal
Diverse Styles
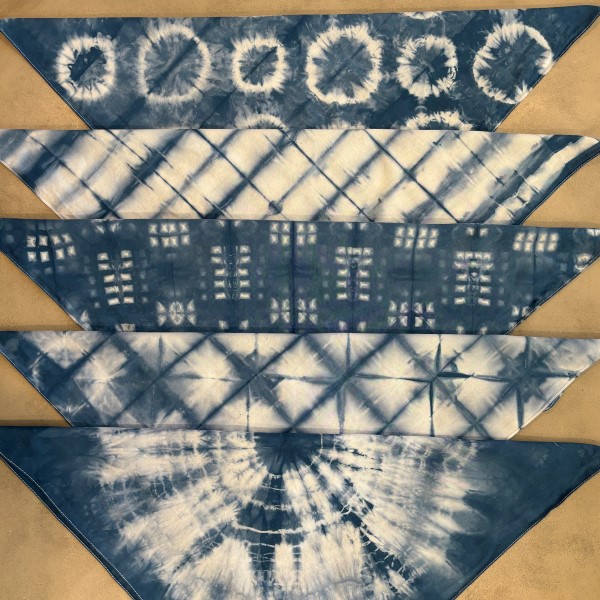
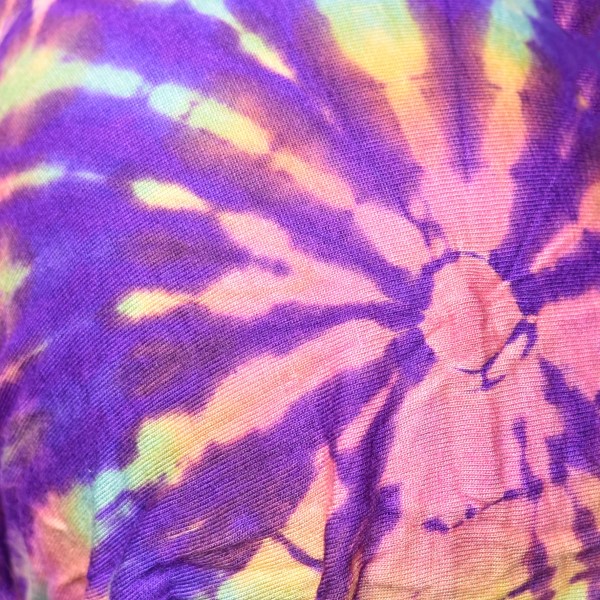
One of the most vibrant aspects of bandana tie dye is the range of styles available. You can create everything from whimsical patterns to sophisticated designs, catering to a diverse audience. The flexibility allows for creativity to flourish, making the process enjoyable for beginner and experienced crafters alike. In 2026, expect to see patterned bandanas adorning clothing, bags, and headbands, providing a fresh touch to any outfit.
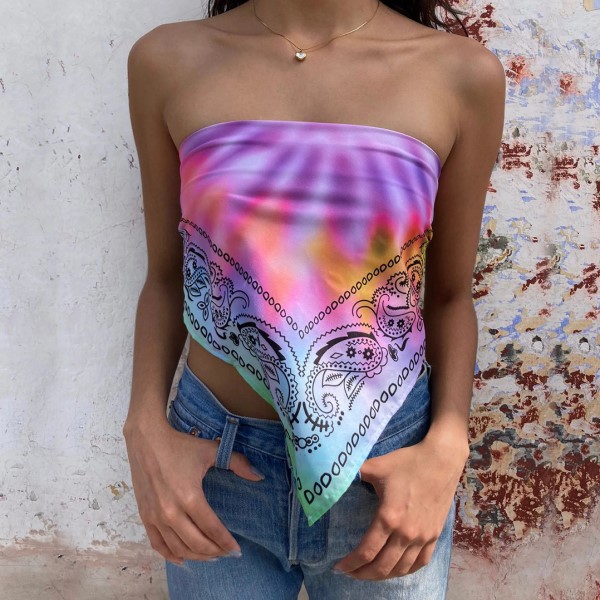
Fashion Versatility
Bandana tie dye can be incorporated into endless fashion domains—from casual wear to more refined outfits. Wear your custom tie-dyed bandana around the neck, as a hair accessory, or even as a fashionable bag accessory. The possibilities are boundless, reflecting an evolving trend that embraces unique artistry. For many, bandana tie dye has become a statement of sustainability and individuality, encouraging folks to personalize their fashion choices.
Eco-Friendly and Fun
Creating your own bandana is not just a fun activity; it’s also an eco-friendly option. Rather than purchasing mass-produced items, making a bandana tie dye from a DIY bandana tie dye kit allows you to reduce your environmental impact. Additionally, using natural dyes can enhance sustainability—bringing awareness to eco-conscious practices in fashion. As consumers look for greener alternatives, bandana tie dye serves as a perfect way to combine creativity with environmental responsibility.
Essential Materials
Choosing the Right Bandana
Before you start, selecting the right fabric for your bandana is crucial. Cotton bandanas are the most commonly used, as they absorb dye well and are comfortable to wear. Choose solid colors to ensure vibrant patterns emerge once dyed. You may also explore other fabrics but be mindful of their dye absorption properties.
Dye Selection
When it comes to dyeing, the choice of dye can greatly impact your final piece. Fabric dyes specifically designed for cotton are ideal, as they adhere better to the fabric. Consider the colors that inspire you—mixing vibrant hues can produce stunning results. Just remember to consider color harmony when selecting shades.
Additional Supplies
Gathering the right tools can make the process smoother. Here’s a quick checklist of what you might need:
Rubber Bands or String
- Creating Sections: Rubber bands or string are essential tools for tie-dyeing as they enable you to create distinct sections on the fabric. By tightly securing areas of the bandana, you can control where the dye is applied, resulting in defined patterns.
- Versatile Usage: Depending on the design you want to achieve, you can use rubber bands to create spirals, stripes, or crumple patterns. The versatility of these materials allows for creativity, letting you experiment with different techniques.
- Adjustable Tension: Rubber bands provide the ability to adjust tension as needed. When you want tighter sections for sharper lines, simply wrap the band more securely. Conversely, looser bands create softer edges, adding variety to your designs.
- Convenient and Affordable: Rubber bands and string are readily available and inexpensive. Their accessibility makes them a popular choice for DIY projects, enabling crafters of all skill levels to participate in tie-dyeing without significant cost.
Plastic Gloves
- Skin Protection: Plastic gloves are crucial when handling dye. They help protect your skin from staining that can occur during the dyeing process, ensuring that your hands remain clean and free from unwanted color.
- Hygiene Maintenance: Wearing gloves while dyeing is also a matter of hygiene. It prevents the transfer of dye and chemicals to your skin, which can sometimes cause irritation or allergic reactions, particularly among sensitive individuals.
- Comfort and Flexibility: While protective, plastic gloves also allow for flexibility, making it easy to manipulate the fabric as you tie, twist, and dye. This balance of protection and ease of movement is essential for achieving the best results.
- Eco-Friendly Options: For those looking for sustainable choices, consider using biodegradable gloves or reusable fabric gloves that have been designed for dyeing. This provides a more eco-friendly solution without compromising safety.
Plastic Drop Cloth or Old Newspapers
- Workspace Protection: A plastic drop cloth or old newspapers serve as a protective barrier for your workspace. This prevents dye from staining your table or work surface, making clean-up more manageable and easier post-project.
- Easy Cleanup: Using a drop cloth or newspapers allows for quick and easy removal of dye spills. After completing your project, you can roll up the mess and dispose of it without needing to scrub surfaces.
- Sustainable Practices: Old newspapers are a great way to recycle materials you already have at home. This aligns with eco-friendly practices while also saving on costs associated with purchasing specific products for crafting.
- Versatile Coverage: Beyond covering tables, plastic drop cloths can be draped over floors or wherever you are working, providing comprehensive protection against spilled dyes or overzealous application.
Water Buckets or Squeeze Bottles
- Dye Application: Water buckets and squeeze bottles are essential for applying dye effectively. Buckets can hold larger amounts of dye for soaking or submerging fabric, while squeeze bottles allow for precise application directly onto the bandana.
- Ease of Use: Squeeze bottles streamline the dyeing process, making it easier to control the amount and placement of dye. This is especially beneficial when creating intricate designs or working with multiple colors.
- Multiple Dyes: If you’re working with various colors, having several squeeze bottles ready can help keep each dye separate. This organization enhances your efficiency and creativity, letting you switch from one color to another without confusion.
- Mixing Solutions: Water buckets can also be used for mixing dye solutions. If you’re diluting or mixing colors, having an ample supply in a bucket allows for easy stirring and preparation before you start applying.
Protective Gear
Ensure you wear old clothes or an apron, as dye can stain. Additionally, working in a well-ventilated area is advisable for comfort and safety during dye application.
Step-by-Step Instructions
Step 1: Prepare Your Workspace
Start by laying down your plastic drop cloth or newspapers to protect the work surface. Gather all your materials and ensure everything is within reach. Having an organized area will make the tie-dyeing process more enjoyable.
Step 2: Pre-Wash the Bandana
Before dyeing, it’s advisable to pre-wash your bandana. This helps remove any chemical finishes that might inhibit dye absorption. After washing, dry the bandana completely before proceeding.
Step 3: Create Your Tie Dye Design
Next, you’ll want to decide on the design. You can create various patterns such as spirals, stripes, or hearts. Below are a few techniques:
- Spiral Design: Place the bandana flat, pinch the center, and twist until it forms a spiral. Secure with rubber bands to hold the shape.
- Stripes or Crumple: Fold the bandana in an accordion-style or crumple it randomly. Use rubber bands to create sections that will remain un-dyed or dyed differently.
- Ice Tie Dyeing: For an innovative twist, consider using ice to apply dye. Place ice cubes on your tied bandana, sprinkle powdered dye on top, and let it sit while the ice melts, creating a unique pattern.
Step 4: Apply the Dye
Using your squeeze bottles or brushes, apply the dye to the sections you’ve created. Be imaginative! Experiment with various colors, applying them as you desire. Ensure you cover the fabric thoroughly for a vibrant outcome.
Step 5: Setting the Dye
Once the dye application is complete, it’s time to set the color. Wrap the dyed bandana in plastic wrap and let it sit for the recommended time. This allows the dye to bond with the fabric effectively. A general guideline is to let it sit for at least 6-8 hours, but overnight for the best results.
Step 6: Rinse and Dry
After the dye has set, rinse the bandana under cold water until the water runs clear. Be cautious not to rub the fabric too hard while rinsing, as this may cause the colors to run. Once rinsed, put it in the washing machine on a gentle cycle. After washing, hang it to dry in a shaded area away from direct sunlight to prevent fading.
Creative Bandana Tie Dye Ideas for Summer 2026
Floral Patterns
Floral designs continue to be on-trend for summer 2026. You can create flower-inspired tie dye using techniques like folding the fabric to mimic petals or creating clustered dye spots to emulate blossoms.
Geometric Shapes
Utilize bandana tie dye patterns that incorporate geometric shapes. By securing the fabric with rubber bands in various shapes and applying contrasting colors, you can achieve modern artistic designs that are perfect for summer outfits.
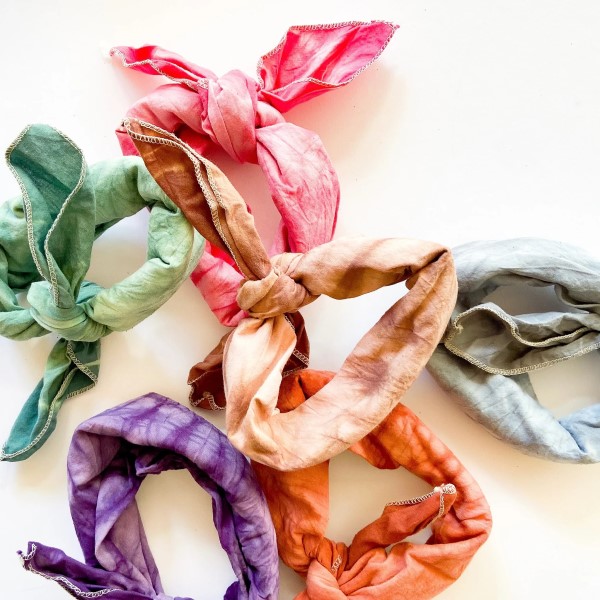
Ombre Effects
A popular and sophisticated approach is the ombre technique, which creates a gradient effect. This involves applying lighter hues at one end of the bandana, gradually blending into darker shades. The result is a beautiful transition of color that draws the eyes.
Bold Color Combinations
Now is the time to embrace vibrant colors! Bandana tie dye is ideal for experimenting with bold and unconventional color combinations. Pair hot pink with electric blue or lime green with deep purple for a standout piece.
FAQs about Bandana Tie Dye
Can you tie dye bandanas?
Absolutely! Bandanas are perfect for tie dyeing. Their size and fabric make them easy to work with, allowing for creative designs and vibrant colors.
How to tie a bandana to look like a tie?
To tie a bandana like a tie, start by folding it into a triangle. Wrap it around your neck and pull the ends behind. Cross them over and bring them forward, then tuck one end under the other to create a chic look.
What colors not to mix when tie dying?
When tie-dyeing, it’s wise to avoid mixing colors that clash or do not blend well, such as red and green or blue and orange. These combinations can lead to muddy colors instead of vibrant results.
How to finish the edges of a bandana?
To finish the edges of a bandana, consider using a zigzag stitch to prevent fraying. Alternatively, you can also apply bias tape for a clean, finished look that adds an extra design element.
Conclusion
Bandana tie dye remains a trendy and creative way to express yourself in summer 2026. From discovering how to bandana tie dye to experimenting with various bandana tie dye techniques and fun bandana tie dye patterns, this art form promises endless possibilities. Engaging in this colorful activity allows for stylish personalization of fashion accessories, enhancing your summer wardrobe. Don’t miss out on the chance to create unique pieces that reflect your personality! Dive into the world of DIY bandana tie dye—your next favorite accessory awaits.