
Contents
Elevate Your Celebrations with a DIY Name Banner
Celebrations are all about personal touches, and one of the best ways to add uniqueness to your event is by creating a diy name banner. Whether it’s a birthday party, a baby shower, or any special occasion, a custom banner can elevate the decor and make your celebration truly memorable. In this article, we will delve into various aspects of crafting your own name banner, including diy name banner ideas, tutorials, and tips to help you succeed. Whether you’re looking for an easy diy name banner tutorial or printable options, we’ve got you covered!
Why Create a DIY Name Banner?
Creating a custom diy name banner allows for limitless creativity. Here are some reasons why you should consider making one for your next event:
1. Personalization
A DIY name banner offers the opportunity to showcase the name of your guest of honor or personalize the event theme. Adding a name creates a welcoming atmosphere and sets a celebratory tone. Kids love to see their names in lights, and adults appreciate personalized touches, too.
2. Cost-Effective Decor
Buying ready-made banners from stores can be expensive. However, crafting your own banner can save money. You can use materials you already have at home or purchase inexpensive supplies at your local craft store. Plus, creating a diy name banner for birthday parties can often be done within a budget.
3. Fun for All Ages
Making a name banner can be a fun craft project for kids and adults alike. Gather friends or family for a crafting party, allowing everyone to contribute their unique ideas. This collective experience often brings everyone closer together and adds to the joy of the event.
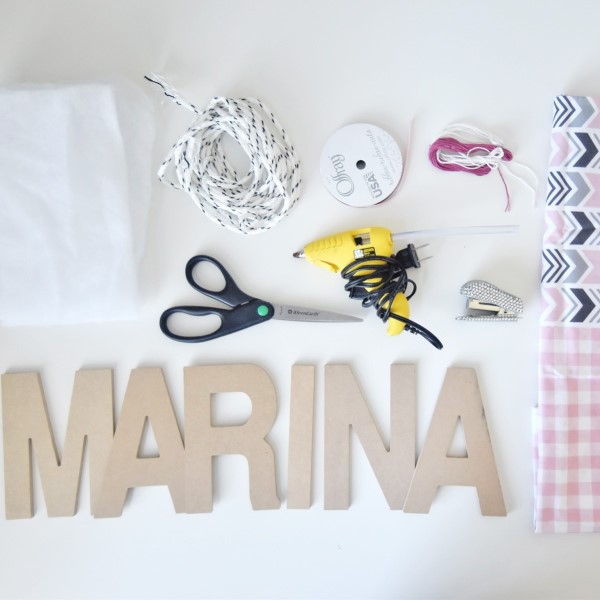
Materials Needed
Before getting started, it’s essential to gather your materials. The supplies you will need may vary based on your desired design, but here are some common materials:
1. Fabric or Paper
Depending on your preference, you can use fabric, craft paper, or card stock for the letters. Fabric can give a more rustic or sophisticated look, while paper is often easier to work with for beginners.
2. Scissors
A good pair of scissors is crucial for cutting your chosen material into the desired shapes and sizes.
3. String or Ribbon
You’ll need string, twine, or ribbon to hang your letters in sequence. This choice of material can add additional decoration to your banner.
4. Glue or Tape
Adhesives are necessary for keeping your letters attached to the string or ribbon. You might use glue, double-sided tape, or even a stapler, depending on your materials.
5. Decorations
Consider adding embellishments, such as stickers, glitter, or other decorations. This step can enhance the appearance of your name banner and customize it even further.
Step-by-Step Guide
Crafting your own name banner is easier than you might think. Follow this easy diy name banner tutorial to create a charming decoration for your next celebration:
Step 1: Plan Your Design
Begin by deciding the overall design of your banner. Consider colors, font sizes, and additional decorations. Planning helps ensure you have all necessary materials on hand.
Step 2: Cut Out the Letters
Using your chosen material, cut out the letters that spell out the name or phrase you want to display. You can use stencils for more complex designs or freehand for a more casual feel.
Step 3: Prepare the String or Ribbon
Cut a long piece of string or ribbon that is appropriate for the length of your banner. Save some extra length for tying the banner to walls or ceilings.
Step 4: Attach the Letters
Start attaching the letters to the string or ribbon. Space them out evenly. You can use glue or tape to secure them. Make sure that they are securely attached so they don’t fall off during the celebration.
Step 5: Add Decorations
If you wish, embellish your name banner with stickers, glitter, or other decorative elements. This step adds a personal touch and makes the banner more festive.
Step 6: Hang Your Banner
Once your banner is complete, find a good spot to display it. Whether you hang it over a table, on a wall, or in a window, a festive backdrop enhances the overall atmosphere of your celebration.
Popular Ideas
Now that you know how to make a name banner, here are various diy name banner ideas to inspire your creativity:
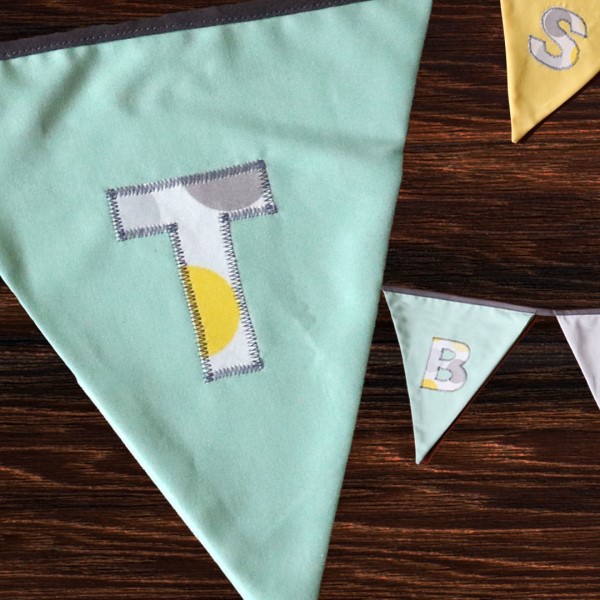
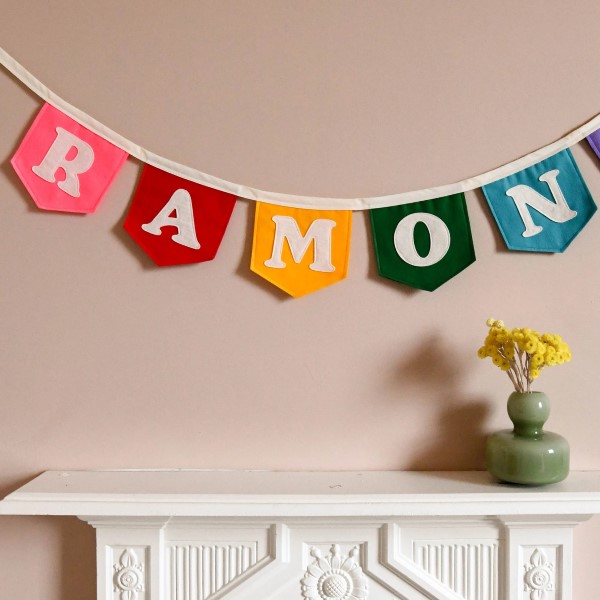
1. Themed Banners
- Specific Themes: Themed banners can be tailored to fit various interests and celebrations. Popular themes include princesses for little girls, superheroes for action lovers, and even beloved book or movie characters.
- Color Coordination: When designing themed banners, it’s crucial to choose colors that reflect the theme. For example, vibrant pinks and purples work well for a princess theme, while bold reds and blues suit superhero themes.
- Matching Fonts: Select fonts that align with the theme. Script fonts may enhance a fairy tale vibe, while bold, block letters could work better for a superhero banner. The right font choice contributes to the overall theme perception.
- Decorative Elements: Include thematic decorations like stars, hearts, or character images. These embellishments enhance the visual appeal and clearly convey the theme to onlookers, making your banner instantly recognizable.
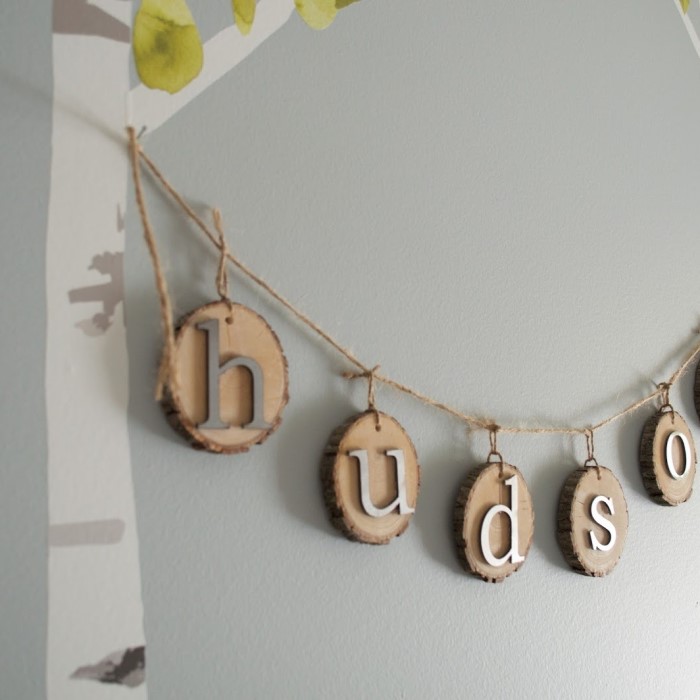
2. Vintage Style
- Material Choices: Using materials such as burlap and lace brings a rustic charm to your banner. Burlap adds texture and an earthy feel, while lace provides a delicate touch that is both romantic and visually appealing.
- Ideal Occasions: Vintage-style banners are particularly well-suited for occasions like weddings, anniversaries, garden parties, or any event with a rustic or nostalgic theme.
- Color Palette: Soft, muted colors are key for creating a vintage inspired look. Consider pastel shades like blush, lavender, and mint green to evoke a sense of nostalgia and warmth.
- Font Selection: Pair your materials and colors with elegant fonts that reflect vintage aesthetics. Fonts with a handwritten or cursive style can enhance the sophistication of your banner. Combining these elements creates a cohesive and charming display.
3. Seasonal Designs
- Embrace the Seasons: Seasonal banners can reflect the distinct characteristics of each time of year. For spring, opt for pastel colors like light pinks, yellows, and soft greens. For summer, brighten it up with bold colors such as hot pink, turquoise, and sunny yellow.
- Fall Themes: Incorporating warm hues like oranges, browns, and deep reds works beautifully for autumn celebrations. Elements like leaves or pumpkins can also be included in the design to emphasize the season.
- Winter Aesthetics: Cool blues and whites can be paired for winter-themed banners, evoking a sense of tranquility and cold. Adding snowflakes or holiday motifs enhances the seasonal vibe.
- Adapting Decorations: Adjusting the decorations and wording on your banner according to the season makes it more relatable. For example, using flowers for spring and snowflakes for winter gives each banner a fresh and seasonally relevant look.
4. Interactive Banners
- Engaging Elements: Design banners that encourage interaction from guests. This could involve including spaces for guests to write messages or activities to participate in during the event.
- Birthday Celebrations: For a birthday party, consider incorporating the celebrant’s age alongside their name. This personalizes the banner and makes it a focal point of the celebration, inviting guests to celebrate with enthusiasm.
- Activity Instructions: If the event includes games or activities, adding brief instructions or clues to the banner can create excitement. For example, a scavenger hunt banner could list items for guests to find throughout the venue.
- Visual Appeal: Use bright colors, bold letters, and engaging graphics to make interactive elements noticeable and inviting. A well-designed banner prompts guests to engage with it, contributing to a fun atmosphere at the event.
FAQs
To make a personalized banner, choose your materials, cut out letters that spell the name or phrase, and attach them to string or ribbon. Use decorations to enhance the design.
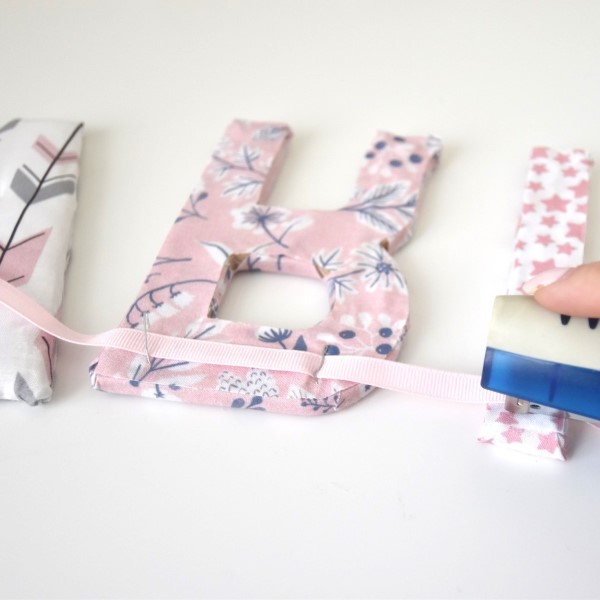
Cut fabric into the desired letter shapes, secure them onto a string, and embellish as desired. Use fabric glue to attach decorations or letters for a unique look.
Absolutely! In fact, a DIY birthday banner is a popular project. Personalize it for the birthday person and choose colors that match the party theme.
While AI can generate designs or provide templates, crafting a personalized banner often requires human creativity and adjustments to reflect personal tastes.
Conclusion
Creating a diy name banner is not only cost-effective but also an enjoyable way to add a personal touch to any celebration. With the right materials and a little creativity, you can craft a stunning custom diy name banner that showcases your unique style and theme. Whether you’re exploring various diy name banner ideas or following an easy diy name banner tutorial, the final product is sure to be a hit at your event.
So, gather your supplies and start crafting your next name banner today! Whether used at birthday parties, baby showers, or other celebrations, your efforts will surely resonate with everyone involved. Enjoy the process, and let your creativity shine!