
Contents
- 1 Introduction to Creating Your Own Photo Station
- 2 Selecting the Perfect Camera Equipment
- 3 Designing a Captivating Backdrop
- 4 Curating Fun and Interactive Props
- 5 Essential Software and Applications
- 6 Lighting Setup for Professional Results
- 7 Organizing Your Supplies and Layout
- 8 Frequently Asked Questions
- 9 Conclusion: Unleashing Your Creativity
Introduction to Creating Your Own Photo Station
Creating a memorable event requires engaging activities. Therefore, a diy photo booth serves as a perfect solution. Many people search for creative diy photo booth ideas to entertain their guests. You might wonder how to make a diy photo booth from scratch. Fortunately, the process is straightforward and enjoyable. You need to focus on several key elements. First, a stunning diy photo booth backdrop sets the scene. Second, you must gather fun diy photo booth props. Finally, organizing your diy photo booth supplies ensures a smooth setup. A photo station captures memories instantly. Consequently, guests leave with tangible keepsakes. This addition works for weddings, birthdays, and corporate events alike. Unlike hired services, a self-made station saves money.
Moreover, it allows for total creative control. You tailor the aesthetic to your specific theme. Thus, the final product feels more personal. Building this station does not require professional skills. Anyone with a camera and a bit of imagination can succeed. We will explore the essential components in detail. This guide covers hardware, software, and decorative elements. By the end, you will possess the knowledge to build a fantastic attraction. Your guests will love the interactive experience. Therefore, let us start this creative journey. The first step involves understanding the core components. You need a camera, a backdrop, and various accessories. These elements work together to create magic.
Selecting the Perfect Camera Equipment
The heart of your station is the camera. Therefore, choosing the right device is crucial. You do not need the most expensive gear. However, a quality camera ensures clear photos. Many creators use a DSLR or a mirrorless camera. These devices offer excellent image quality. Additionally, they allow for manual settings. You can adjust the exposure and focus. Consequently, your photos remain sharp in various lighting conditions. Alternatively, you might use a tablet or a smartphone. Modern phones have impressive cameras. They are also user-friendly.
Furthermore, a tablet offers a large screen for viewing. This allows guests to see themselves easily. However, dedicated cameras provide a more professional look. You should also consider a sturdy tripod. A tripod keeps the camera steady. Therefore, blurry photos become a non-issue. Position the tripod at a comfortable height. Ensure it does not obstruct the walking path. Moreover, you need a remote shutter or a button. Guests should trigger the camera themselves. This adds to the interactive nature of the booth. You can buy a wireless remote shutter. Or, you can use a touchscreen interface. Consequently, the process becomes seamless. Think about the printing aspect as well. Some setups include an instant printer. Guests love physical photos. Therefore, a portable printer is a worthy investment. It connects wirelessly to your camera or device. Thus, the workflow remains efficient.
Designing a Captivating Backdrop
The background sets the tone for the photos. Therefore, it requires careful planning. A diy photo booth backdrop can be simple or elaborate. You choose the style that fits your event. For a rustic wedding, consider using wood planks. Alternatively, you might use a greenery wall. Artificial vines create a lush, natural look. Furthermore, fabric backdrops work wonderfully. You can use curtains, bed sheets, or sequin cloths. These materials add texture and depth. Consequently, the photos look dynamic. You can purchase ready-made backdrops online. However, making your own saves money. For instance, you can create a balloon wall. Inflate balloons in various sizes. Then, attach them to a backdrop stand. This creates a festive and colorful atmosphere.
Additionally, paper streamers offer a budget-friendly option. Twist long strips of crepe paper. Attach them to a rod or string. Thus, you create a whimsical effect. Lighting also plays a role in the backdrop. String lights add a magical glow. They create a bokeh effect in the background. Therefore, the final image looks professional. You must ensure the backdrop is wide enough. It should accommodate groups of people. Furthermore, secure the backdrop properly. Safety is paramount. You do not want it falling on your guests. Thus, use sandbags or weights on the stand.
Curating Fun and Interactive Props
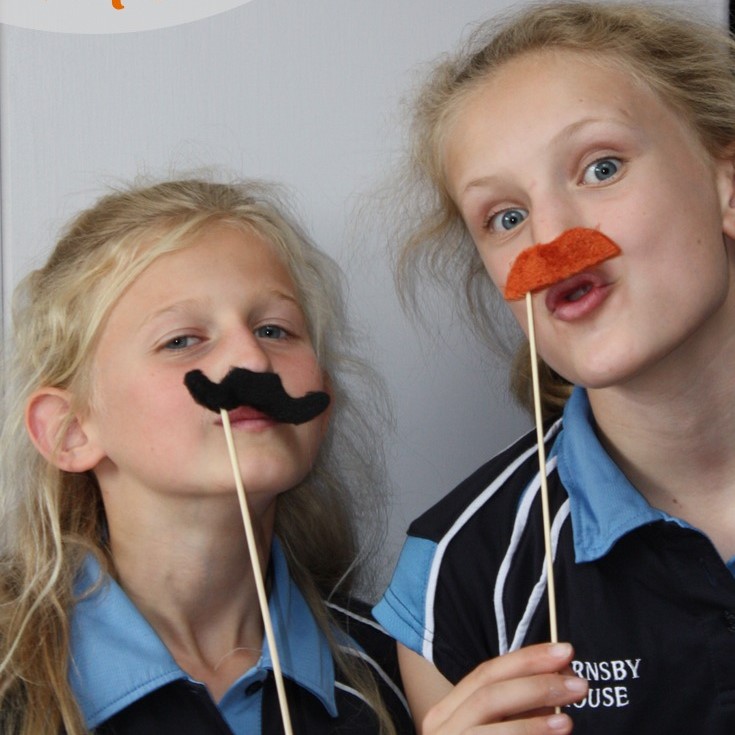
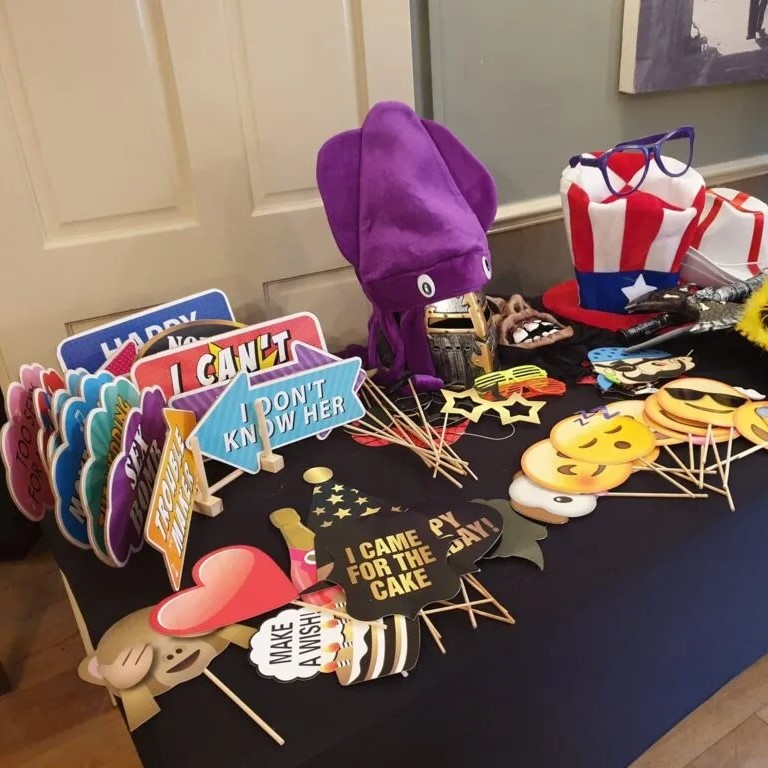
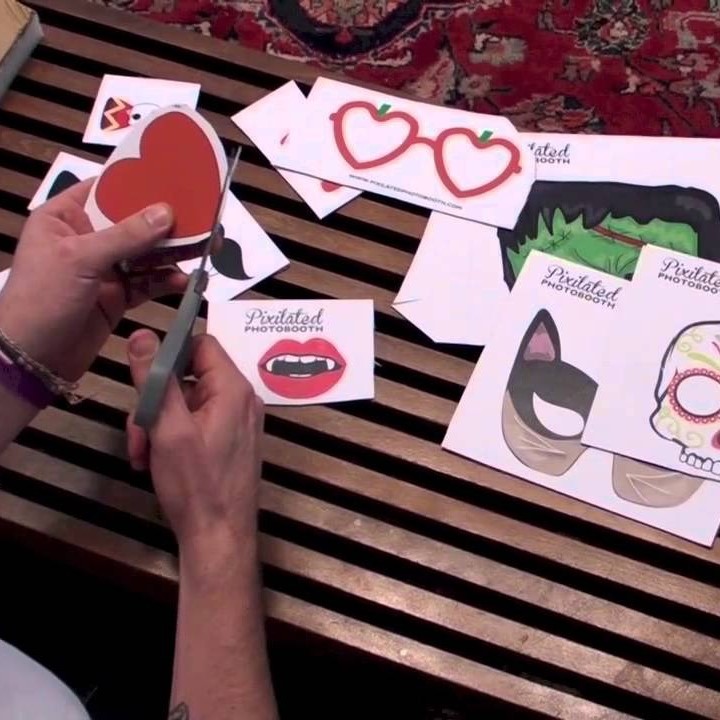
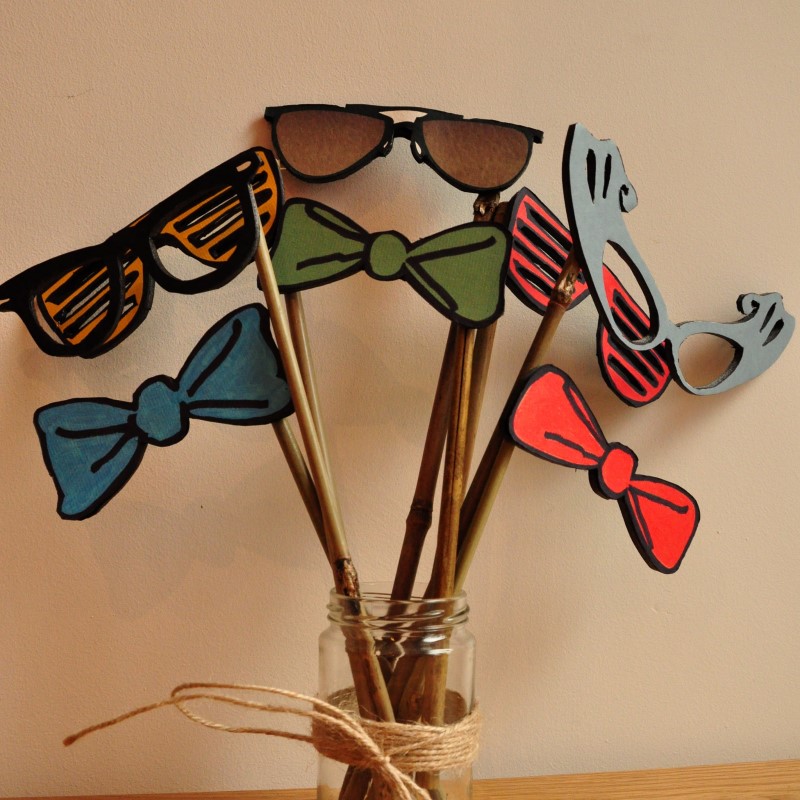
Props are the life of the party. Therefore, you must select them wisely. Diy photo booth props encourage guests to let loose. You can buy pre-made prop kits. These often include glasses, hats, and speech bubbles. However, custom props add a unique touch. You can design your own on a computer. Print them on cardstock for durability. Then, attach them to wooden dowels. Consequently, guests can hold them up easily. Consider the theme of your event. If it is a birthday, use signs about aging. For a wedding, use romantic quotes. Furthermore, you can provide costume pieces. Funny hats, boas, and oversized glasses are classics. They transcend language barriers. Therefore, everyone can participate. You should also include a chalkboard or whiteboard.
Guests write personal messages on them. This adds a personal element to the photo. Organize your props on a table. Use buckets or jars for storage. This keeps the area tidy. Moreover, it allows guests to browse easily. You can also hang props on a pegboard. This displays them as part of the decor. Consequently, the prop station itself looks inviting. Rotate the props during the event. This keeps the experience fresh. Thus, guests take multiple rounds of photos.

Essential Software and Applications
Technology simplifies the process. Therefore, you should utilize photo booth software. Several applications are available for tablets. These apps automate the photo-taking process. They display a countdown timer. Consequently, guests know when to pose. Some apps even apply filters. This enhances the final image. Furthermore, many apps offer green screen features. You can superimpose digital backgrounds. This feature opens up endless creative possibilities. You might also consider a GIF mode. Guests create short, looping animations. This adds a modern twist to traditional photos. The software can also handle printing. It connects to a wireless printer. Therefore, the queue moves quickly. You can enable social media sharing. Guests email or text photos to themselves.
This increases engagement with your event online. Thus, your event gains more exposure. Some popular apps offer customization. You can add a logo or a date stamp. This brands your photos professionally. Additionally, the software organizes the images. They save directly to a gallery. You do not need to manage files manually. Consequently, you save time and effort. Choose software that is intuitive. A complex interface frustrates guests. Therefore, test the app thoroughly before the event.
Lighting Setup for Professional Results
Good lighting distinguishes a good photo from a great one. Therefore, you cannot ignore this aspect. Natural light is ideal. However, events often occur indoors or at night. Thus, you need artificial lighting. A ring light is a popular choice. It provides even, flattering light. Furthermore, it creates a distinct catchlight in the eyes. You can mount a ring light on a tripod. Place it behind the camera. Consequently, the subjects are well-illuminated. You might also use off-camera flashes. These provide more power and control. However, they require more technical knowledge.
Softboxes are also excellent tools. They diffuse the light. Therefore, harsh shadows disappear. This creates a soft, professional look. Avoid using the camera’s built-in flash. It often results in red-eye and harsh shadows. Moreover, it flattens the image. Instead, use continuous lighting. This allows guests to see how they look. Consequently, they can adjust their pose. You should also consider the background lighting. Illuminate the backdrop to separate it from the subject. This adds depth to the photo. Thus, the image looks three-dimensional. Battery life is another consideration. Ensure your lights have fresh batteries or a power source. Therefore, the fun never stops.
Organizing Your Supplies and Layout
Efficiency is key to a smooth operation. Therefore, you must organize your diy photo booth supplies. Create a checklist of all items. This includes the camera, tripod, props, and lights. Furthermore, pack everything in a sturdy container. Use labels to identify boxes. Consequently, setup becomes faster. You should design the layout of the booth. Ensure there is enough space for a queue. You do not want the line to block walkways. Additionally, position the booth in a high-traffic area. This attracts attention. However, avoid placing it too close to the dance floor.
You do not want vibrations to blur the photos. Place a table near the entrance. This holds the props and the guest book. Consequently, guests interact with the items before the photo. You might also assign an attendant. This person helps troubleshoot any issues. They can also encourage shy guests to participate. Therefore, the booth remains active throughout the event. The attendant can also restock props and paper. This ensures the booth never runs dry. Thus, the experience remains consistent. A well-organized booth reflects positively on the host. It shows attention to detail.
Frequently Asked Questions
How do I create my own photobooth?
You can create your own photobooth by setting up a camera on a tripod. Then, arrange a backdrop and provide props. Use a remote shutter or an app for easy capture.
What to have instead of a photo booth?
You can set up a video message station. Alternatively, you can hire a caricature artist. Another option is a “polaroid guest book” station where guests take their own photos.
What is a DIY photo booth?
A DIY photo booth is a homemade setup for taking pictures. It typically includes a camera, lighting, a backdrop, and props. It allows guests to take photos at their leisure.
How to make a pop-up photo booth?
To make a pop-up photo booth, use a portable backdrop stand. Pack lightweight props and a tablet. This setup allows for quick assembly and disassembly in any location.
Conclusion: Unleashing Your Creativity
Building a photo station is a rewarding project. It combines creativity with technology. You have learned the essential steps. We discussed the importance of a diy photo booth. You now have a list of diy photo booth ideas. You understand how to make a diy photo booth. You know how to design a diy photo booth backdrop. You have selected the best diy photo booth props. Furthermore, you organized all your diy photo booth supplies. Each element contributes to the final experience. Your guests will appreciate the effort.
They will leave with lasting memories. Therefore, do not hesitate to start building. This project enhances any celebration. It brings people together. Moreover, it provides endless entertainment. You can customize every detail. Thus, your event stands out. Remember to have fun during the process. The joy you put into making it shows in the results. A successful photo booth lives on in memories. So, grab your tools and start creating today. Your perfect event awaits.