Contents
- 1 Introduction to EVA Foam Cosplay
- 2 What Is EVA Foam and Why Use It in Cosplay?
- 3
- 4 Essential Tools for Working with EVA Foam
- 5 Choosing the Right Thickness and Density of EVA Foam
- 6 Techniques for Cutting and Shaping EVA Foam
- 7
- 8 How to Assemble and Glue EVA Foam Pieces
- 9 Creating Details: Adding Textures and Engravings
- 10 Tips for Painting and Finishing EVA Foam Projects
- 11 Maintaining and Repairing EVA Foam Costumes
- 12 Conclusion: Elevate Your Crafting Skills with EVA Foam
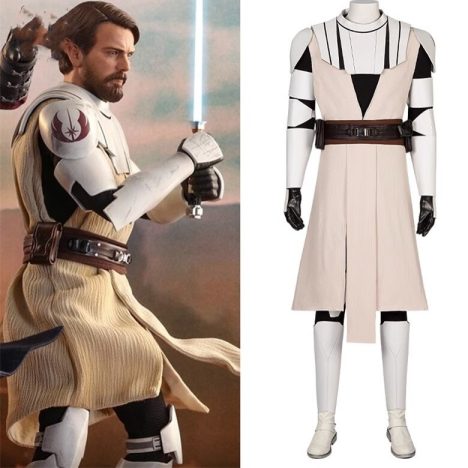
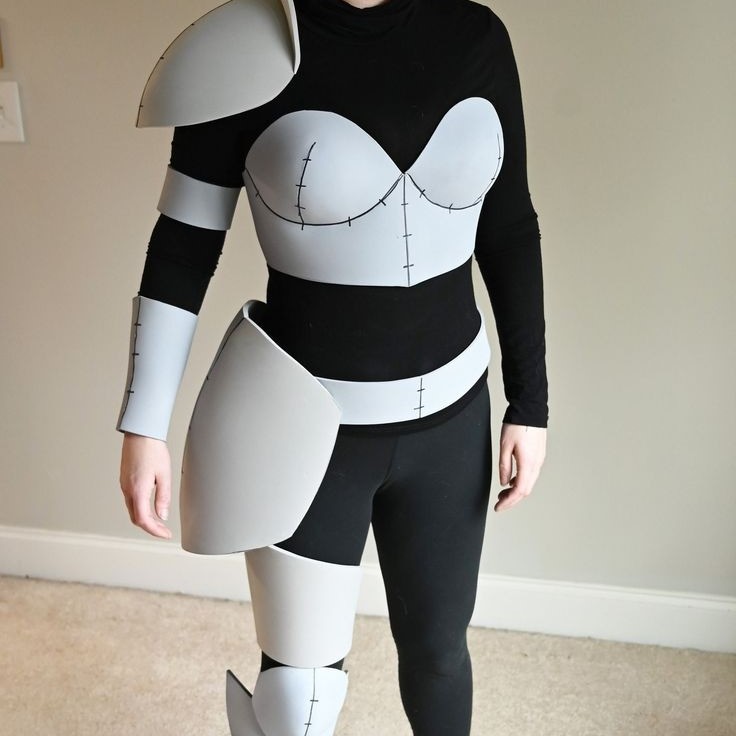
Introduction to EVA Foam Cosplay
EVA foam cosplay has become a popular choice among costume creators. Its lightweight, flexible, and durable material makes it ideal for producing intricate designs. Whether you are a seasoned cosplayer or just starting, having the right tools significantly enhances your crafting experience. In this article, we will explore the top tools for EVA foam cosplay that will elevate your crafting skills. You’ll find details on how to use these tools effectively, ensuring your cosplay stands out at conventions.
What Is EVA Foam and Why Use It in Cosplay?
EVA foam is a lightweight, durable, and versatile material. It stands for Ethylene Vinyl Acetate foam. EVA foam is widely used in cosplay for its flexibility and ease of use. It can be cut, shaped, and molded into almost any design.
Why Use EVA Foam for Cosplay?
- Lightweight: EVA foam is light, making it ideal for wearing costumes for long periods.
- Affordable: It is budget-friendly compared to other crafting materials.
- Flexible: EVA foam can bend and flex without breaking, perfect for comfortable costumes.
- Durable: Properly finished foam can endure wear and tear during conventions.
- Customizable: It accepts paint and finishes well for detailed designs.
- Easy to Work With: It is easy to cut, heat, shape, and glue.
Cosplay enthusiasts love EVA foam for its adaptability. It allows crafters to create intricate designs, from armor to props. With practice, you can craft professional-looking costumes using EVA foam. It is a go-to material for beginners and professionals alike, offering excellent results.
Essential Tools for Working with EVA Foam
To work with EVA foam for cosplay, you need the right tools. Having the correct tools ensures you can cut, shape, glue, and finish your projects effectively.
Cutting Tools
- Utility Knife: Use a sharp utility knife for clean cuts through the foam.
- Scissors: Ideal for cutting thinner EVA foam sheets.
- Craft Knife: Handy for intricate and detailed cuts.
- Cutting Mat: Protect your workspace and keep cuts precise.
Shaping Tools
- Heat Gun: A heat gun softens foam for bending and shaping.
- Sanding Tools: Sandpaper or rotary tools help smooth edges and create curves.
- Templates: Use paper templates to guide complex shapes.
Adhesives
- Contact Cement: Provides strong bonds for foam pieces.
- Hot Glue Gun: Useful for quick and flexible adhesive.
- Super Glue: Works well on small details.
Painting and Finishing Tools
- Paintbrushes: Use various sizes for paint application.
- Acrylic Paint: Ideal for painting EVA foam projects.
- Primer: Prepares foam for smooth, vibrant paint.

Safety Supplies
- Gloves: Protect skin during sanding, gluing, and painting.
- Face Mask: Prevent inhalation of fumes and dust.
- Eye Protection: Avoid getting debris or glue in your eyes.
With these tools, you can successfully craft EVA foam costumes and props. Invest in quality tools for better results and a smoother crafting process.
Choosing the Right Thickness and Density of EVA Foam
When selecting EVA foam for your cosplay projects, thickness and density are crucial factors. These properties determine the foam’s flexibility, durability, and purpose in your design.
Thickness
- Thin Foam (2mm–4mm): Ideal for small details and intricate designs, such as ornamental trims.
- Medium Foam (5mm–8mm): Perfect for armor pieces and props that need both flexibility and stability.
- Thick Foam (10mm and above): Best for structural elements requiring rigidity, like weapon blades or shields.
Density
- Low-Density Foam: Lightweight and compresses easily, great for soft, detailed work.
- Medium-Density Foam: Balanced flexibility and durability, suitable for costume parts worn frequently.
- High-Density Foam: Strong and rigid, ideal for items subject to impact or added stress.
Factors to Consider
- Project Requirements: Pick foam thickness and density based on the type of item you’re making.
- Comfort: Choose flexibility for wearable parts to ensure ease of movement.
- Strength: Use high-density foam for props or armor needing sturdiness.
- Layering: Combine different thicknesses for enhanced detail and structure.
Understanding EVA foam thickness and density helps you choose the right foam for your cosplay. Adjust your selection to achieve the best balance between aesthetics and functionality.
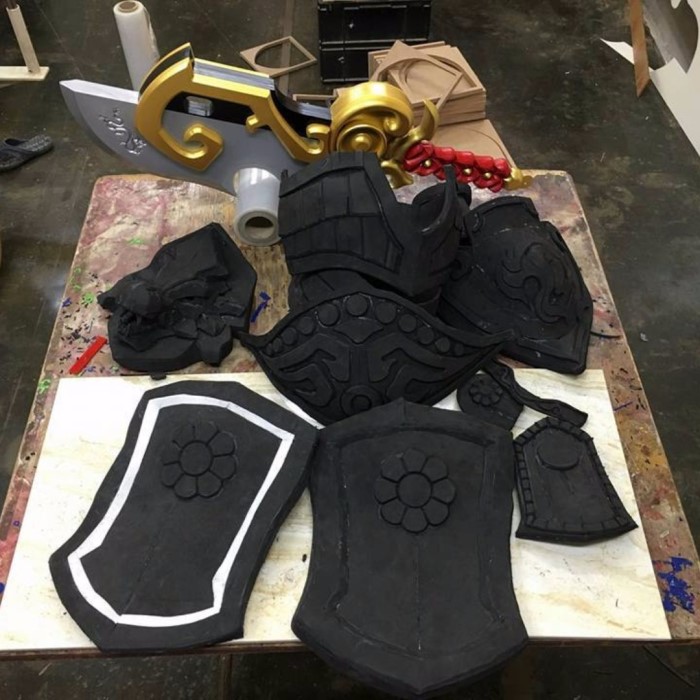
Techniques for Cutting and Shaping EVA Foam
Mastering cutting and shaping techniques is essential for working with EVA foam in cosplay. With the right tools and methods, you can achieve precise cuts and smooth curves for professional-looking results.
Cutting EVA Foam
- Mark Your Design Clearly: Use a marker or pencil to draw your design on the foam.
- Use a Sharp Utility Knife: Dull blades lead to jagged edges, so replace them frequently.
- Cut in Steady Motions: Apply even pressure and avoid sawing for smooth edges.
- Employ a Straight Edge: Use rulers or templates to guide straight cuts and curves accurately.
- Use Scissors for Small Cuts: For thin foam, scissors can provide better control over detailed cuts.
- Practice First: Test cutting techniques on scrap foam to refine your skills.
Shaping EVA Foam
- Heat for Curves: Use a heat gun to soften EVA foam for bending and shaping.
- Move the Heat Gun Constantly: Avoid overheating to prevent melting or burning.
- Shape Around a Mold: Wrap heated foam around a rounded object for smooth curves.
- Pinch Foam for Edges: Bend and pinch foam to create sharp corners or sharp patterns.
- Smooth Edges with Sanding Tools: Use sandpaper or sanding sponges for refining and smoothing.
- Work With Patience: Take your time to ensure an even and professional look.
Tips for Success
- Use Safety Equipment: Protect your hands and eyes while cutting and heating foam.
- Measure Twice, Cut Once: Double-check measurements for a precise design.
- Test Techniques First: Experiment with scrap foam for a better idea of how it reacts.
Following these cutting and shaping techniques will help you create impressive cosplay pieces. Remember, practice and the right tools make a big difference.
How to Assemble and Glue EVA Foam Pieces
Assembling and gluing EVA foam pieces is a key step in crafting cosplay costumes. It requires precision, the right techniques, and tools to ensure strong, durable connections.
Preparing Your EVA Foam for Assembly
- Clean the Edges: Sand the edges of your foam pieces to remove rough cuts.
- Test Fit: Arrange and align the foam pieces to check their positioning.
- Mark Alignment: Use a marker to note where the foam pieces will join together.
Choosing the Right Adhesive
- Contact Cement: Ideal for strong bonds; ensure even application for maximum strength.
- Hot Glue: Best for quick fixes and areas needing flexibility.
- Super Glue: Great for attaching intricate pieces and small details.
Gluing Techniques
- Apply Adhesive Evenly: Spread a thin layer of glue on both surfaces you want to join.
- Wait for Tackiness: Allow contact cement to become tacky before pressing the surfaces together.
- Press Firmly: Ensure strong adhesion by applying consistent pressure.
- Use Clamps or Weights: Helpful for holding pieces in place while the glue sets.
Combining Multiple Layers
- Score and Sand Edges: Create grooves to ensure a seamless bond.
- Layer Strategically: Place larger pieces first and add details gradually.
- Use Pattern Templates: Trace and cut precise shapes for neat layering.
Tips for Success
- Work in Small Sections: Focus on one area at a time to prevent misalignment.
- Remove Excess Glue: Wipe away spills immediately to maintain a clean appearance.
- Test Before Assembling: Check adhesives on scrap foam first to understand their behavior.
- Stay Safe: Use gloves and work in a well-ventilated area to avoid fumes.
Proper assembly and gluing ensure your EVA foam cosplay withstands wear and tear. Careful preparation and patience are the keys to creating stunning, durable costumes.
Creating Details: Adding Textures and Engravings
Adding textures and engravings to EVA foam brings depth and character to your cosplay. These techniques elevate your work and make your costumes stand out. Let’s explore how to add unique details using EVA foam.
Adding Textures to EVA Foam
- Use Heat Tools: Heat tools can create texture by softening the foam.
- Use a heat gun to warm the foam.
- Stamp or press objects with patterns onto the warm foam.
- Let it cool to preserve the texture.
- Engrave with a Heat Pen:
- Heat pens are perfect for precision work.
- Use them to carve fine details like lines or patterns into the foam.
- Imprint with Tools:
- Use textured rollers or materials like sandpaper.
- Roll or press these tools onto the foam for an embossed design.
- Cut Out Layers:
- Use thinner foam for smaller details.
- Cut details and glue them onto the base layer to create depth.
- Use Stencils:
- Place stencils on the foam as a guide.
- Trace the design before carving or sanding.
Engraving Techniques
- Carving Tools:
- Use a craft knife to carve patterns.
- Follow drawn lines for precision.
- Dremel or Rotary Tool:
- A Dremel is ideal for deeper engravings.
- Choose the right tip for your desired pattern.
- Burn Marks for Realism:
- Use a wood-burning kit for an aged or distressed look.
- Practice first on scrap foam.
Tips for Success
- Plan Ahead: Sketch out your designs on paper first.
- Practice: Test techniques on foam scraps before starting your project.
- Go Slow: Take your time to ensure accurate and clean results.
- Use Protective Gear: Protect your hands and use a face mask when burning or engraving foam.
- Experiment: Try different tools and materials to add unique textures.
By mastering these techniques, you can create stunning details in your EVA foam cosplay. Practice, experiment, and let your creativity shine!
Tips for Painting and Finishing EVA Foam Projects
Painting and finishing your EVA foam cosplay is essential for achieving a polished, professional look. The right techniques and materials can enhance your costume and make it stand out. Follow these tips to paint and finish your projects effectively.
Preparing EVA Foam for Painting
- Clean the Surface: Wipe the foam to remove dust and dirt before painting.
- Seal the Foam: Apply a layer of primer to seal the foam and smooth its surface.
- Plasti Dip: Provides a flexible and durable base for paint.
- Flex Seal: Creates a rubberized surface for better paint adherence.
- Mod Podge or PVA Glue: A budget-friendly option for sealing foam.
- Sand the Edges: Smooth any rough edges using sandpaper or a sanding sponge.
- Apply Thin Layers: Thin out the primer to avoid clumps and uneven surfaces.
Painting EVA Foam
- Choose the Right Paint: Acrylic paint is ideal for EVA foam as it dries quickly.
- Use Multiple Coats: Apply several light coats for better coverage and vibrant colors.
- Layer Paint Gradually: Start with base colors and build up with details and shading.
- Use Brushes of Different Sizes: Choose small brushes for details and large ones for covering areas.
- Airbrushing: Use an airbrush for smooth and even paint application.
- Test Colors: Test paints on scrap foam to ensure the desired look.
Finishing Touches
- Protect the Paint: Use a clear sealant to protect the finish from scratches or fading.
- Matte Finish: Creates a subtle, non-glossy appearance.
- Glossy Finish: Adds shine and highlights details.
- Weathering Effects: Add wear and tear to make costumes look realistic.
- Use dry brushing to create aged or distressed looks.
- Add layers of darker shades to mimic shadows or dirt.
- Highlight Details: Use metallic paint for armor or gold accents for decorative effects.
- Secure Decorative Pieces: Add extra adhesive or sealant to keep small details intact.
- Check for Touch-Ups: Inspect the project for uneven paint or missed spots.
Painting and Finishing Tips
- Patience is Key: Let each coat dry completely before adding another.
- Work in a Ventilated Area: Avoid inhaling fumes from paint or sealants.
- Use Safety Equipment: Wear gloves and a mask to protect your skin and lungs.
- Practice First: Experiment on spare foam to refine techniques.
By following these tips, your EVA foam cosplay pieces will look stunning and last longer. Proper painting and finishing make your creations visually appealing and convention-ready.
Maintaining and Repairing EVA Foam Costumes
Proper maintenance and repair of EVA foam costumes keep them looking great and extend their lifespan. Here’s how you can care for them:
Routine Upkeep
- Clean After Use:
- Wipe off dirt and dust with a damp cloth. Avoid soaking the foam.
- Store Properly:
- Keep costumes in a dry, cool space to prevent warping.
- Use padded hangers or boxes for structural pieces.
- Avoid Heat and Moisture:
- Store costumes away from direct sunlight or humid areas.
- Excess heat or moisture can weaken foam bonds.
Inspect for Damage
- Check for Cracks and Tears:
- Inspect areas prone to stress, like joints and connecting parts.
- Loose Decorations and Paint Chips:
- Look for peeling paint or detached detail pieces.
Repair Techniques
- Fix Tears and Cracks:
- Use contact cement or super glue for strong and lasting repairs.
- Clean and sand the damaged area before applying adhesive.
- Repaint Damaged Areas:
- Touch up scratches or faded paint.
- Use matching paints and seal with a clear finish.
- Reinforce Weak Spots:
- Add extra foam layers to strengthen high-stress areas.
- Sand and repaint for a seamless look.
Maintenance Tips
- Handle Gently:
- Avoid putting excess pressure on delicate areas.
- Refrain from dropping heavy props or armor.
- Use Protective Coating:
- Regularly apply sealant to prevent cracking and scratches.
- Check Before Events:
- Conduct a full inspection and make repairs ahead of conventions.
Proper care ensures your EVA foam costume stays stunning and durable for future events.
Conclusion: Elevate Your Crafting Skills with EVA Foam
EVA foam cosplay enables creators to express their artistic vision thoroughly. By investing in the right tools and utilizing innovative techniques, you can significantly elevate your crafting skills. In summary, tools like hot wire cutters, craft knives, and Dremel rotary tools play a crucial role in creating stunning pieces. Embrace these methods and stay updated with the latest trends to make your EVA foam cosplay stand out. Create with confidence and enjoy the exciting world of cosplay!