Contents
- 1 Introduction
- 2 Understanding the Basics of Jean Hemming
- 3
- 4 Preparing Your Jeans for the Perfect Hem
- 5
- 6 The Traditional Machine Method for Durable Hems
- 7 The “Original Hem” Technique for a Factory Look
- 8
- 9 Hand Sewing Techniques for a Personal Touch
- 10 Quick Fixes: Using Fabric Tape for Temporary Hems
- 11 Styling Your Hemmed Jeans in 2026
- 12 Common Mistakes to Avoid When Hemming
- 13 FAQ: Answering Your Top Questions
- 14 Conclusion
Introduction
Finding the perfect pair of jeans often feels like a victory. However, the length is frequently a major issue for many people. You might find a style that fits your waist perfectly. Yet, the legs drag on the floor or bunch up awkwardly around your ankles. Consequently, you might leave the store without buying them. Alternatively, you purchase them and never wear them. This is a common frustration for shoppers everywhere. How to hem jeans? Fortunately, you can solve this problem at home.
You do not need to pay a tailor high fees. You can achieve a professional look yourself. This guide explores every method available in 2026. We will cover how to hem jeans by hand for a personal touch. We will also discuss how to hem jeans without a sewing machine for quick fixes. If you own a machine, you will learn how to hem jeans with a sewing machine efficiently. This article is designed as a comprehensive resource on how to hem jeans for beginners. Additionally, we will explain how to hem jeans using fabric tape for a temporary solution. By mastering these skills, you save money and time. Therefore, let us dive into the world of denim alteration.
Understanding the Basics of Jean Hemming
Denim is a unique fabric with a distinct history. It is durable, sturdy, and built to last. Therefore, working with it requires specific knowledge. You cannot treat denim like delicate silk or cotton. The thickness of the material presents a challenge. Specifically, the side seams are often the thickest part. Consequently, you need the right tools to pierce through layers. A standard needle might break under pressure. Thus, using heavy-duty needles is essential for success. Furthermore, thread choice matters significantly. Cheap thread snaps easily on thick denim. You should look for polyester or cotton-wrapped polyester thread. This type withstands the tension of daily wear.
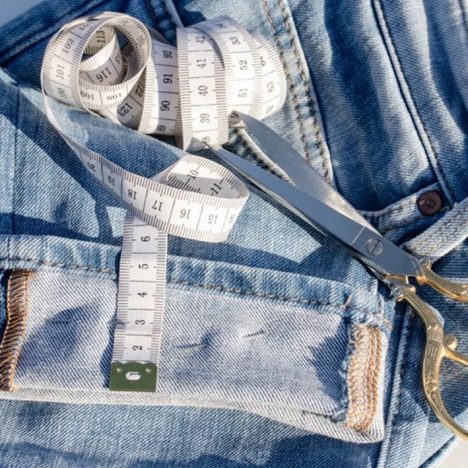
In addition, understanding the “grain” of the fabric helps. Jeans are woven tightly. Therefore, cutting them straight prevents uneven edges. You must also consider the existing hem. Most jeans come with a factory hem. This finish often includes signature stitching. Some people prefer to keep this look. However, shortening the jeans usually removes it. Later, we will discuss keeping the original hem. For now, focus on the basic preparation. Preparation ensures a smooth alteration process. Moreover, measuring accurately saves you from irreversible mistakes. Remember the old adage: measure twice, cut once. This rule applies heavily here. If you cut too much, you cannot undo it. Therefore, take your time during the initial stages. Patience is your best tool in this craft.
Preparing Your Jeans for the Perfect Hem
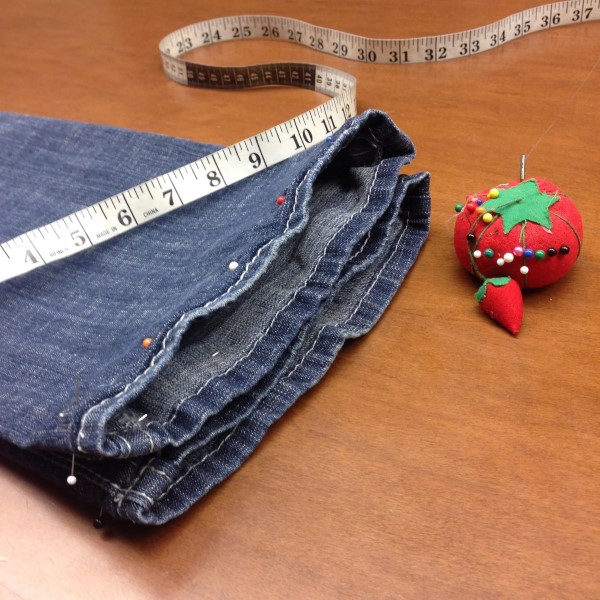
Preparation is arguably the most critical step. First, you must wash and dry your jeans. Denim shrinks after the first few washes. If you hem unwashed jeans, they might shrink later. Consequently, the hem might rise higher than expected. Therefore, start with clean, dry denim. Next, you need to measure the desired length. Put the jeans on inside out. This allows you to pin the new hem easily. Stand in front of a mirror. Then, fold the excess fabric up inside the leg. Use pins to secure the fold. Walk around to test the comfort.
Furthermore, the “two-finger rule” is a helpful guideline here. You should leave a little slack for your foot. Specifically, the hem should not pull tight when you sit. Consequently, ensure you can fit two fingers inside the pinned hem. This accounts for movement and shoe clearance. Once pinned, take the jeans off carefully. Lay them flat on a table. Use a ruler to ensure the fold is even. Often, the back of the leg needs to be slightly longer. This accommodates the heel of your foot. Mark the new hemline with chalk. Then, measure the excess fabric below the chalk line. Iron the fold to create a sharp crease. Ironing makes the sewing process much easier. It keeps the fabric from shifting. Consequently, your stitches remain straight and even.
The Traditional Machine Method for Durable Hems
Using a sewing machine offers speed and durability. This method creates a strong, lasting hem. First, set up your machine correctly. You need a denim needle, usually size 90/14 or 100/16. Standard needles will bend or snap. Additionally, use a strong thread. Topstitching thread is a popular choice for visible seams. However, standard all-purpose thread works for the bobbin. Next, select the correct stitch. A straight stitch is standard for hems. Use a longer stitch length, around 3 to 3.5 mm. This helps penetrate the thick layers.
After setting up, trim the excess fabric. Leave about one inch below the marked line. Then, fold the raw edge up once. Press it with an iron. Fold it up again to hide the raw edge. Pin or clip it securely. Now, you are ready to sew. Start at the inner leg seam. This spot is less visible if you have slight errors. Sew close to the folded edge. Go slowly, especially over the side seams. The bulk of the fabric increases here. You might need to use a “hump jumper” or a piece of cardboard. This levels the presser foot. Consequently, the machine feeds the fabric evenly. Backstitch at the beginning and end. This locks the threads in place. Finally, press the hem again with an iron. This sets the stitches and gives a professional finish.
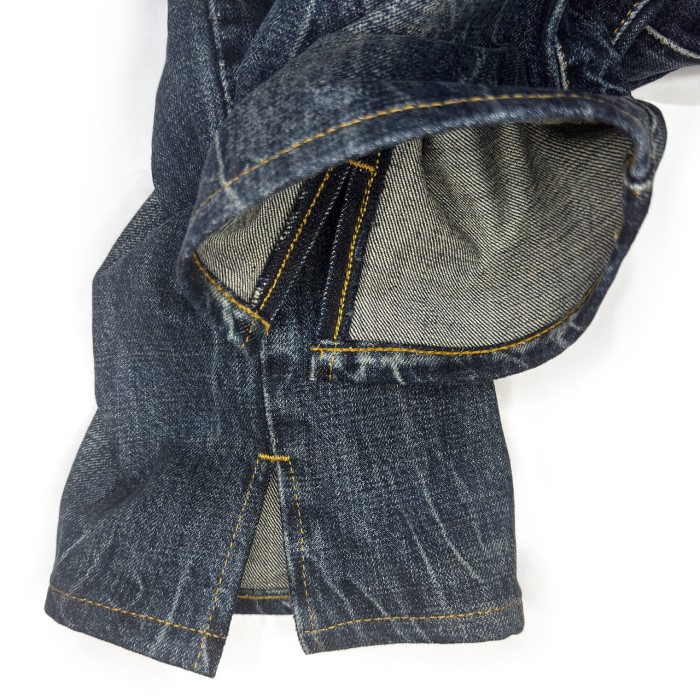
The “Original Hem” Technique for a Factory Look
Many people love the worn look of the original hem. It has distressing and fading that adds character. A standard hem removes this detail. Consequently, the jeans look altered. The “original hem” or “Euro hem” technique solves this. It keeps the factory edge intact. This method requires precision. First, measure the desired length as before. Then, pin the excess fabric up. However, you do not cut the fabric off. Instead, you create a new seam just above the original hem.
To do this, fold the jeans up. Place a pin where the new fold meets the leg. Measure the distance from the fold to the pin. Ensure it is even all around. Then, sew a straight line around the leg. Place this seam about half an inch above the original hem. Use a thread color that matches the original stitching. After sewing, fold the excess fabric up into the leg. The original hem now sits at the bottom edge. Press the new fold flat. The excess fabric stays inside the pant leg. You can choose to leave it there. Alternatively, you can cut it away. If you cut it, leave about half an inch. Then, serge or zigzag the raw edge to prevent fraying. This method is slightly more advanced. However, the result is seamless. No one will know you altered them.
Hand Sewing Techniques for a Personal Touch
Hand sewing is a meditative and precise skill. It allows for maximum control. Therefore, it is excellent for delicate fabrics or thick seams. You do not need a machine. You only need a needle, thread, and thimble. The thimble is crucial for pushing the needle through denim. First, thread your needle. Use a double thread for strength. Knot the end securely. Then, follow the same preparation steps. Fold and press the hem.
There are several stitches you can use. The blind hem stitch is popular. It hides the thread on the outside of the jeans. To do this, pick up a tiny bit of fabric from the leg. Then, pick up a fold of the hem. Repeat this process around the leg. The stitches should be nearly invisible. Another option is the whip stitch. This is easier for beginners. However, it is visible on the outside. It creates a rustic, handcrafted look. Work your way around the hem evenly. Keep your stitches small and consistent. Consequently, the hem will look professional. Hand sewing takes longer than machine sewing. Yet, it is very portable. You can do it while watching TV or traveling. It offers a quiet satisfaction that machines cannot match.
Quick Fixes: Using Fabric Tape for Temporary Hems
Sometimes, you need a quick fix. Perhaps you are in a rush. Or maybe you are borrowing a pair of pants. Sewing might seem too permanent or time-consuming. In these cases, fabric tape is a lifesaver. This method is often called “no-sew hemming.” It uses a double-sided adhesive strip. First, measure and fold the hem. Use an iron to press the fold firmly. Then, insert the fabric tape inside the fold. Make sure it sits flat.

Next, apply heat with an iron. The heat activates the adhesive. Press down firmly for several seconds. Do not slide the iron back and forth. Just press and lift. This ensures the glue bonds with the fibers. Consequently, the hem stays in place. This method is excellent for beginners. It requires no needles or thread. However, it is not as durable as sewing. The adhesive may weaken after washing. Therefore, it is best for temporary adjustments. Or, you can use it to hold the hem in place before sewing. It acts like a basting stitch. This makes the actual sewing much easier. Fabric tape is available at most drugstores or supermarkets. It is an essential item in any emergency sewing kit.
Styling Your Hemmed Jeans in 2026
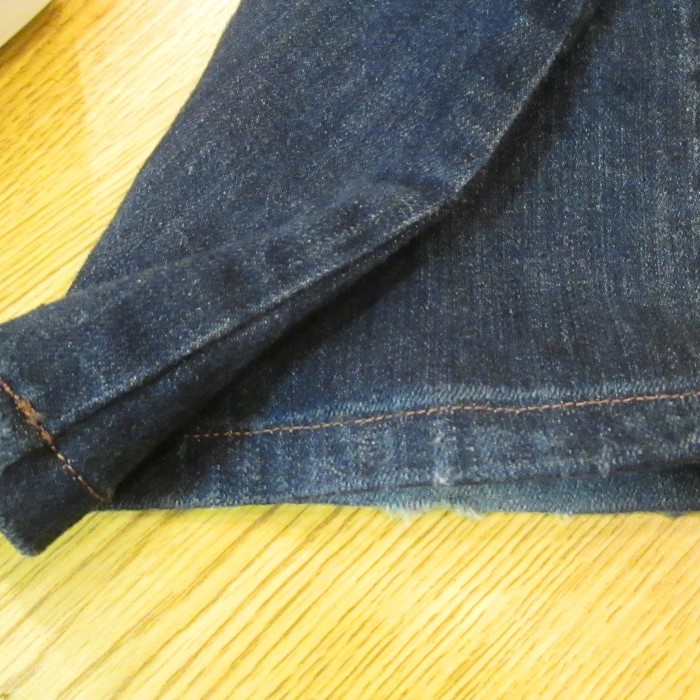
Fashion trends evolve constantly. In 2026, individual style is paramount. A well-hemmed jean is the foundation of a great outfit. The length of your jeans dictates how they interact with your shoes. For example, a straight-leg jean should just graze the top of your shoe. This creates a clean, elongated line. Conversely, a cropped style is trendy for wider legs. This shows off the ankle and your footwear.
Furthermore, the type of hem affects the silhouette. A cuffed hem adds weight. It makes the jean sit heavier on the foot. This works well with boots. On the other hand, a raw, unfinished hem is very trendy. This style features a cut edge that frays slightly. It offers a casual, edgy vibe. You can achieve this by simply cutting the jeans. Then, wash them to encourage fraying. However, you might want to stop the fraying eventually. A line of stitching prevents it from unraveling too far. Additionally, consider the shoe color. Dark jeans with dark shoes lengthen the leg. Light jeans with white shoes create a summery feel. Ultimately, the fit is personal. Therefore, do not be afraid to experiment. Try different lengths for different looks. Your newly hemmed jeans are a blank canvas.
Common Mistakes to Avoid When Hemming
How to hem jeans? Even experienced sewers make mistakes. Recognizing them helps you avoid disaster. One common error is cutting too soon. Always measure twice before cutting. Once cut, you cannot add fabric back. Therefore, leave a little extra margin. You can always trim more later. Another mistake involves the thread tension. If the tension is too tight, the fabric puckers. If it is too loose, the stitches hang. Test your settings on a scrap piece of denim first.
Furthermore, ignoring the side seams causes trouble. These areas are thick. Sewing over them requires care. If you force the fabric, the needle breaks. Or, the machine skips stitches. Use a hammer to flatten the seams before sewing. This breaks down the fibers slightly. Consequently, the needle passes through easier. Also, do not forget to match your thread. Jeans often have topstitching in orange or tan. Using the wrong color looks amateurish. Buy thread specifically for denim or topstitching. Finally, avoid rushing. Hemming requires patience. If you rush, you make errors. Take breaks if you feel frustrated. A calm mind produces better work. Your jeans deserve the effort.
FAQ: Answering Your Top Questions
What is the easiest way to hem jeans?
The easiest method is using fabric tape or hemming tape. It requires no sewing skills. You simply fold the jeans, insert the tape, and iron it. This creates a bond that holds the fabric in place. It is perfect for temporary fixes or beginners.
What is the 2 finger rule for jeans?
This rule ensures your jeans fit comfortably over your foot. When pinning the hem, you should be able to slide two fingers inside the fold. This creates enough slack. Consequently, your foot can pass through easily. It also ensures the hem does not pull when you sit or walk.
Is no sew hemming permanent?
No sew hemming is generally considered temporary. Fabric tape holds well initially. However, washing and drying can weaken the adhesive. Over time, the bond may fail. For a permanent solution, sewing is the best option. It withstands repeated washing and daily wear.
Are unfinished hems still in style?
Yes, unfinished hems are very stylish in 2026. This look is often called the “raw hem.” It offers a relaxed, deconstructed vibe. Many high-end brands feature this style. It is an easy way to update old jeans. You simply cut them to the desired length.
Conclusion
Mastering the art of denim alteration empowers you. You no longer need to rely on expensive tailors. Nor do you need to suffer with ill-fitting pants. You have learned the essential techniques. You now understand the tools required. Whether you choose a machine or a needle, the process is manageable.
We have explored how to hem jeans by hand for precision. We also looked at how to hem jeans without a sewing machine for speed. The section on how to hem jeans with a sewing machine provided professional tips. This guide serves as your manual on how to hem jeans for beginners. Even quick fixes like how to hem jeans using fabric tape are now in your skillset. By applying these methods, you extend the life of your clothing. You also contribute to a more sustainable lifestyle. So, grab your scissors and thread. Start creating your perfect fit today. Your wardrobe will thank you